This post contains affiliate links, meaning that if you click on a link I will recieve a small comission. This costs you nothing extra and I only promote products I use and love! You can read our full disclosure here

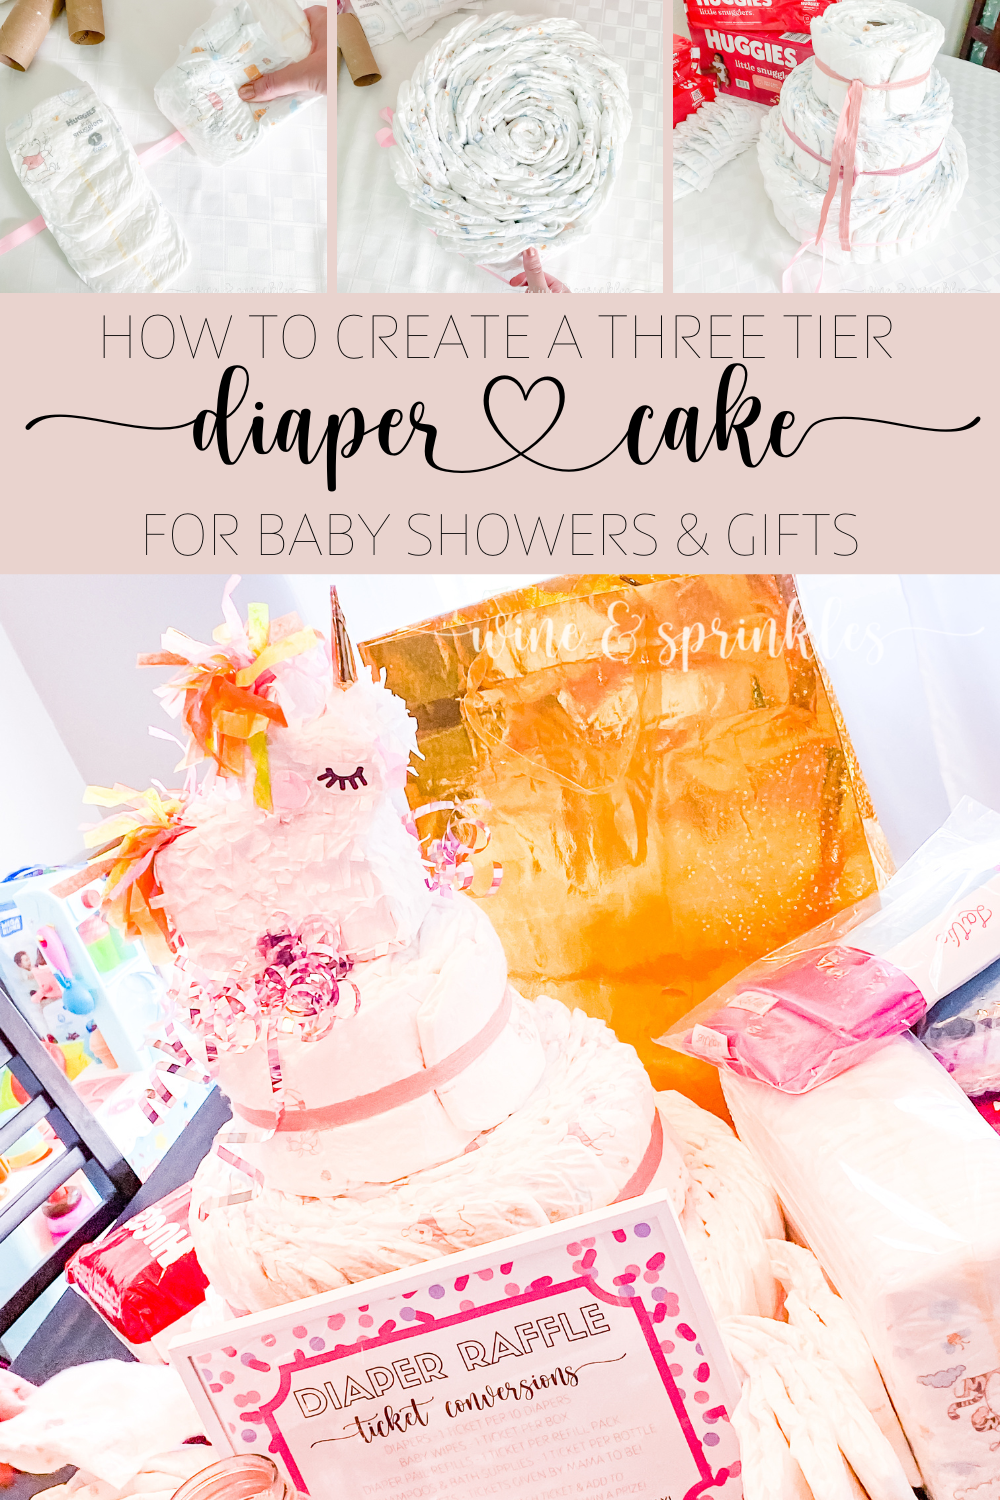
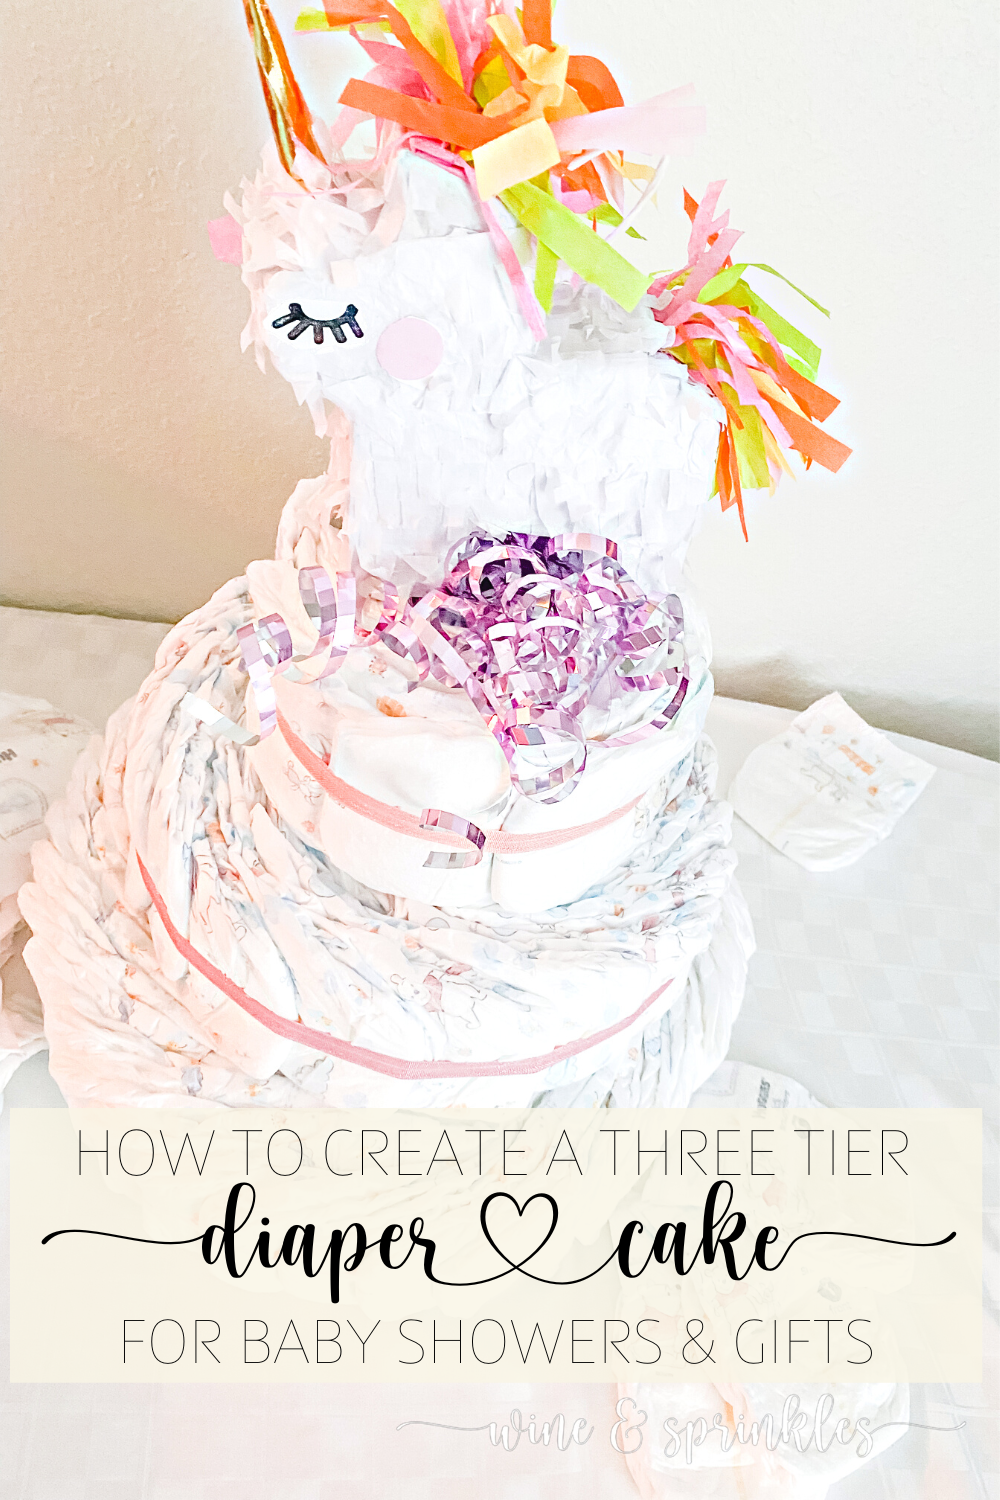
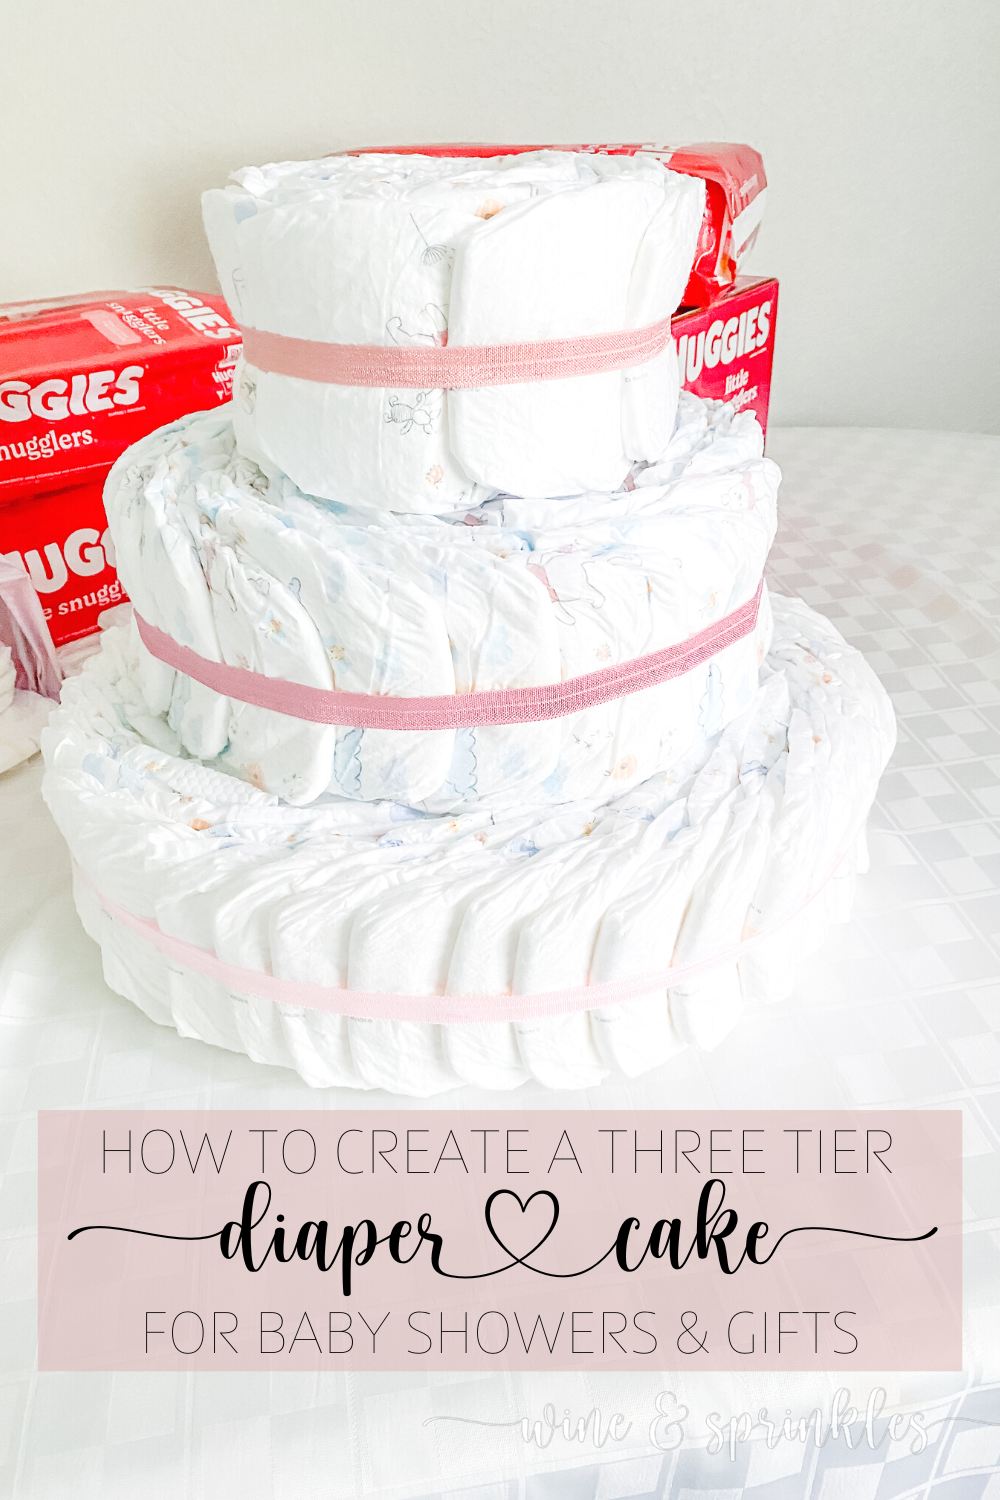
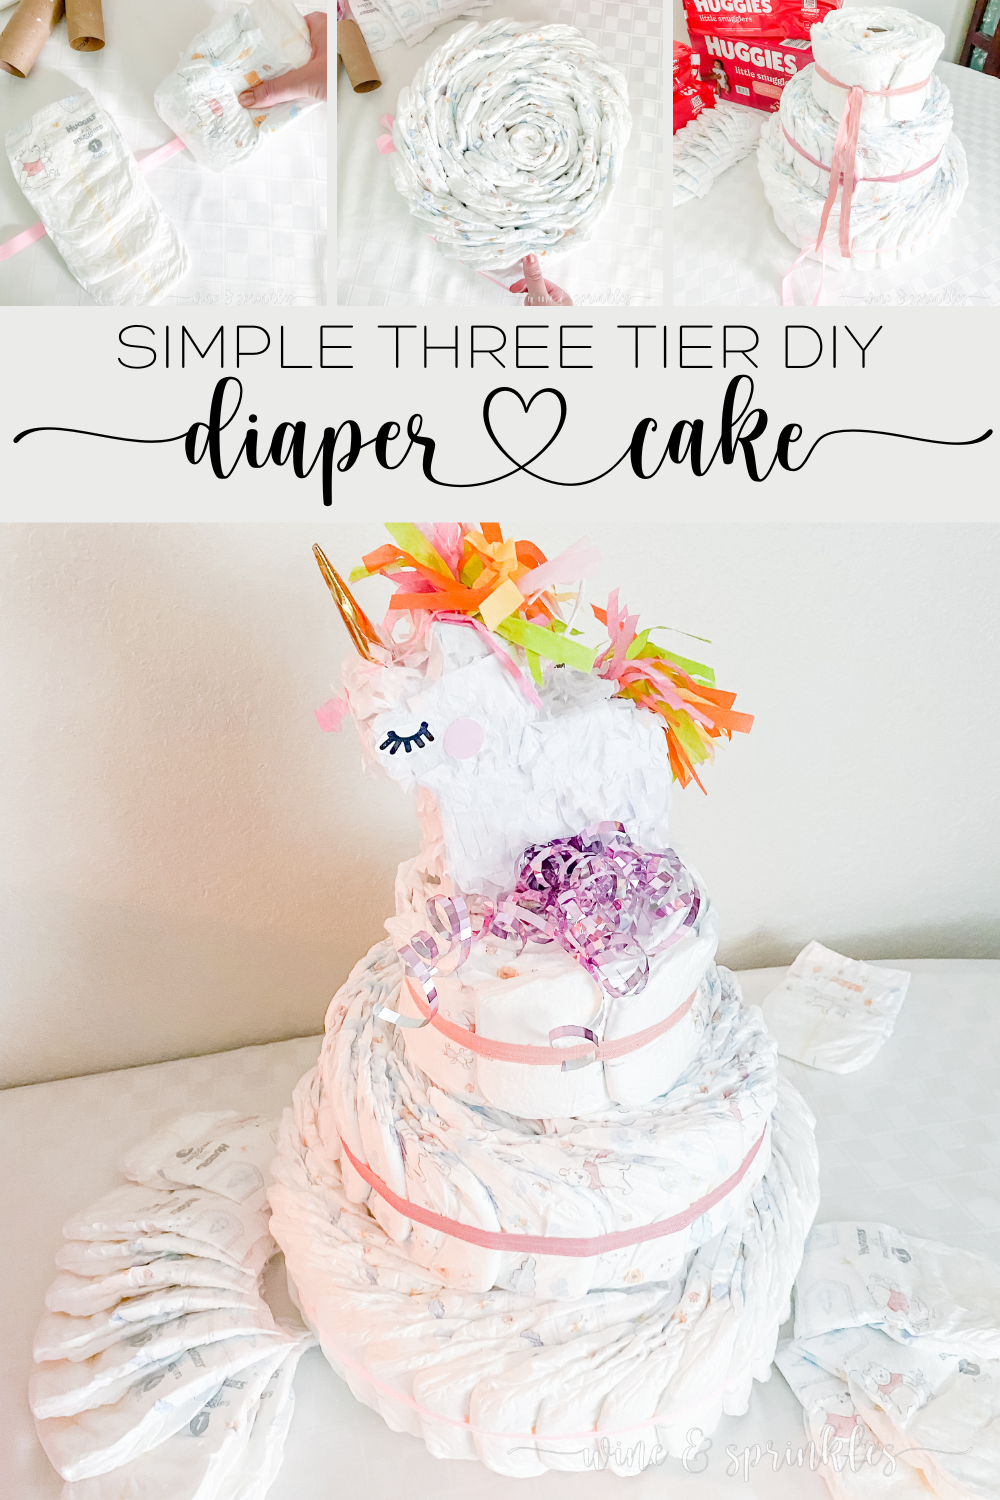
Whether as decoration or a gift, diaper cakes are such a cute way to include a baby’s biggest staple in a fun and creative way for a baby shower! I’ve seen cakes in all sort of sizes and shapes, so when I was helping plan my friend’s Unicorn Diaper Raffle Baby Sprinkle, it was the perfect time to revisit the creation of diaper cakes and create a tutorial for the classic Three tiered wedding cake style centerpiece for the party!
I first started experimenting with diaper cakes a couple years ago when my sister was expecting her first baby, but never got around to finishing writing about it; so when I was asked to help one of my besties with some fun details for her Diaper Raffle Unicorn Baby Shower, I knew it was the perfect opportunity to get back into diaper cake designing and to give my own diapers for the raffle in a fun and festive way!

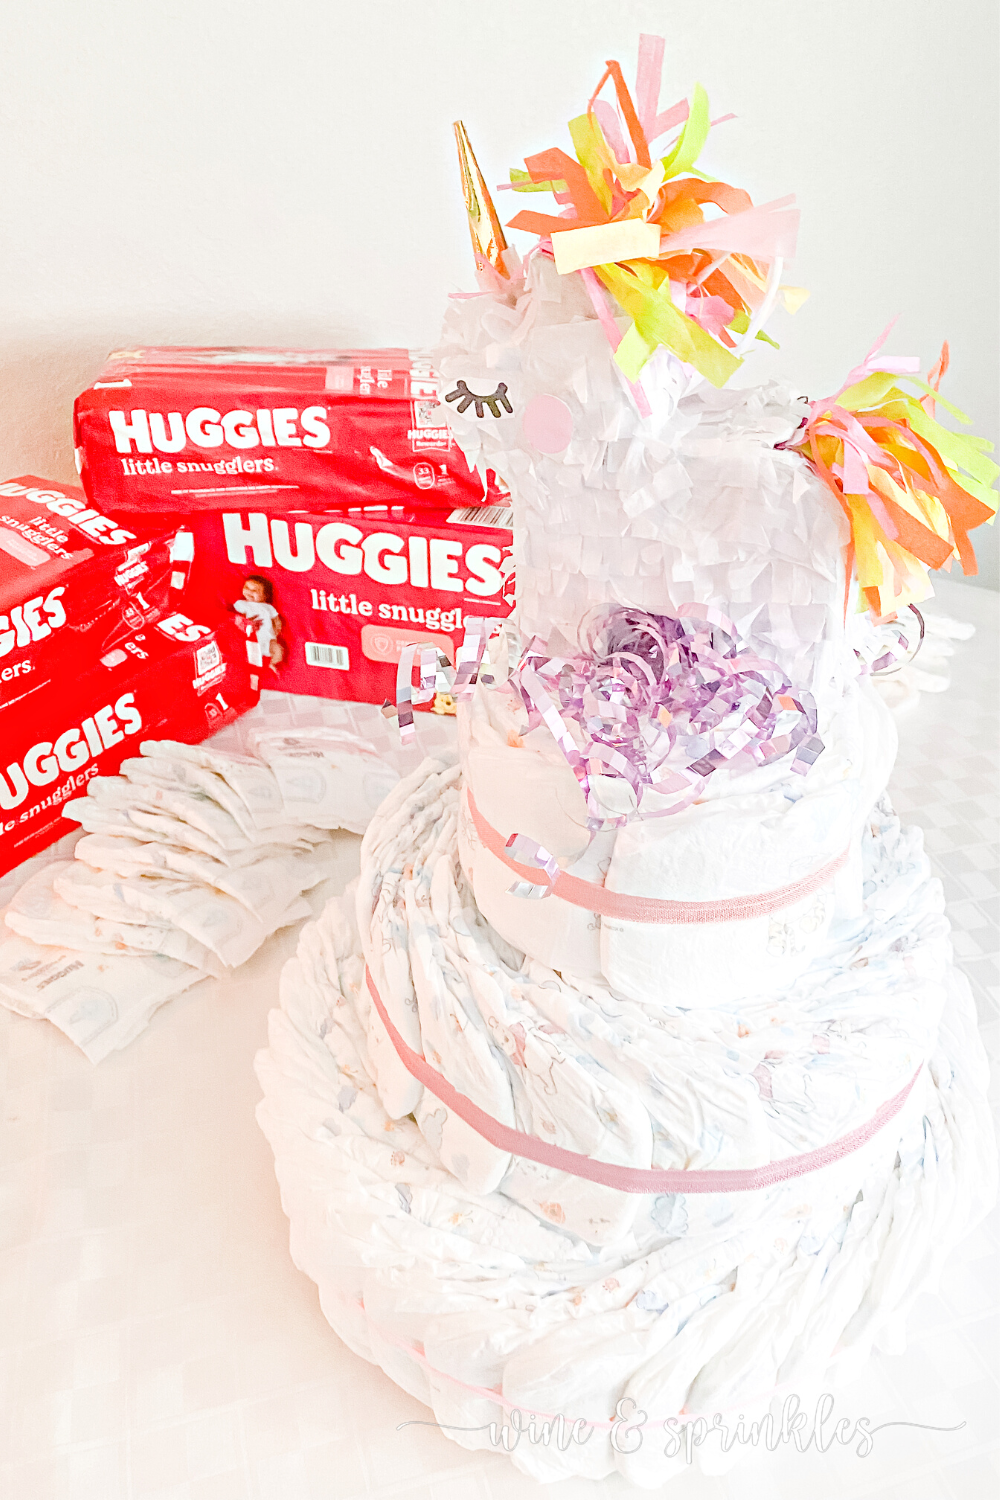
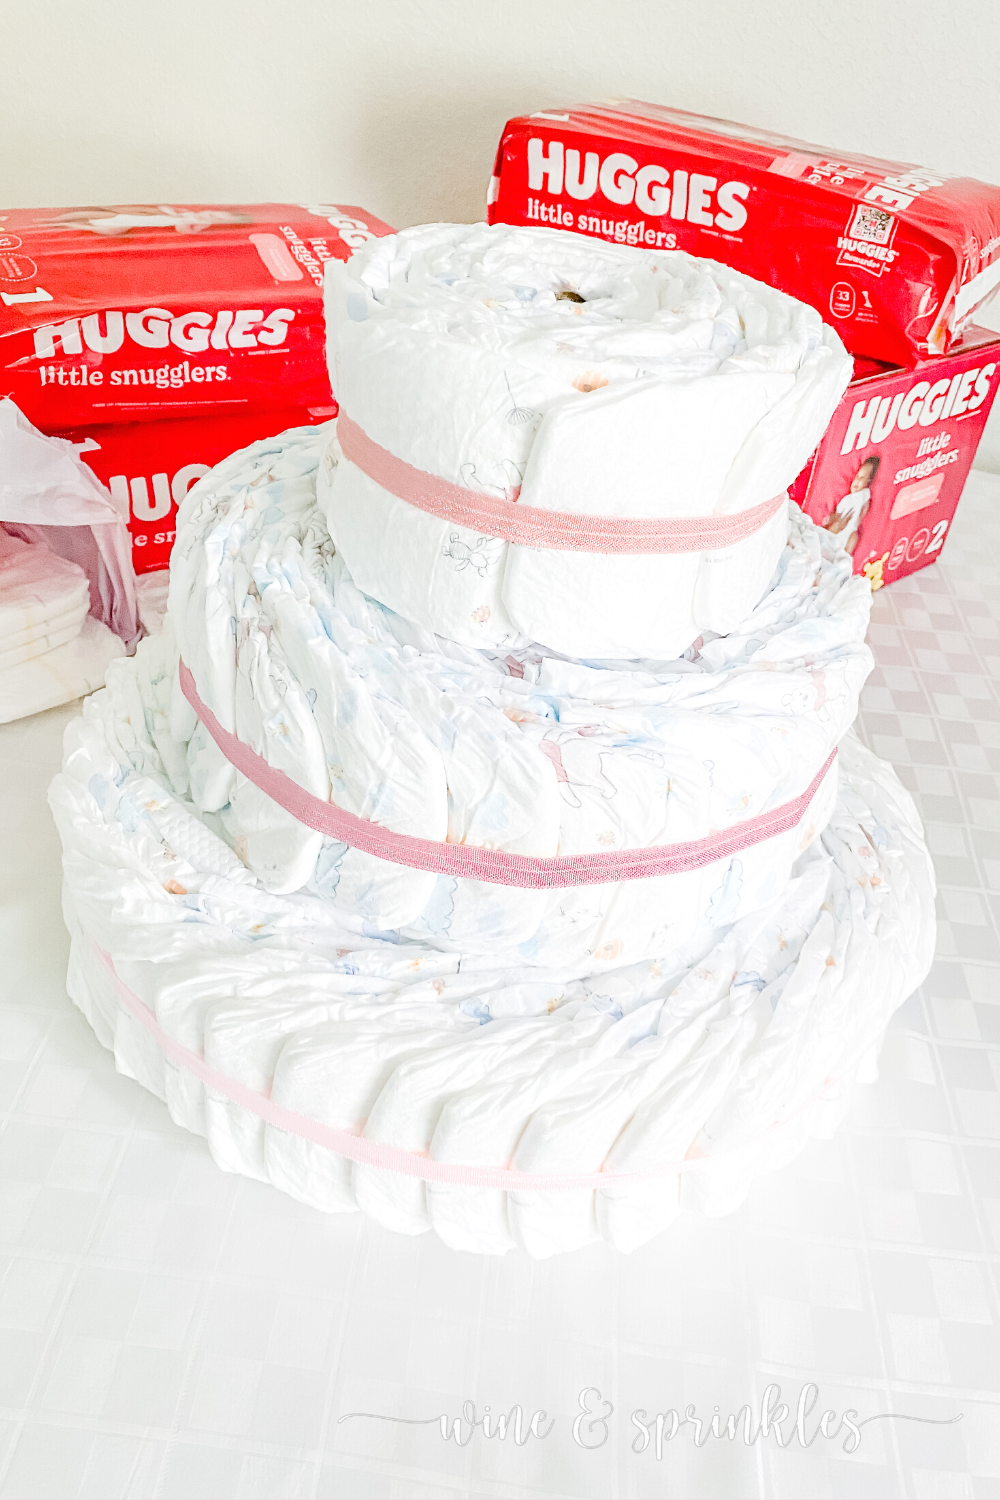
For this cake, I used a combination of size one and two diapers, being the most requested sizes of the parents, with the size one diapers creating the top and bottom tiers and the size two for the middle. I bought two big boxes of diapers to create my cake because I wasn’t sure how many it would take to build it, and I had quite a few still left over! What I found was that my cake took a little under 100 diapers total, so I used some in creating my Candy Bar Diaper Guessing Game, then just gifted the rest as packs of diapers for easier storage by the parents.
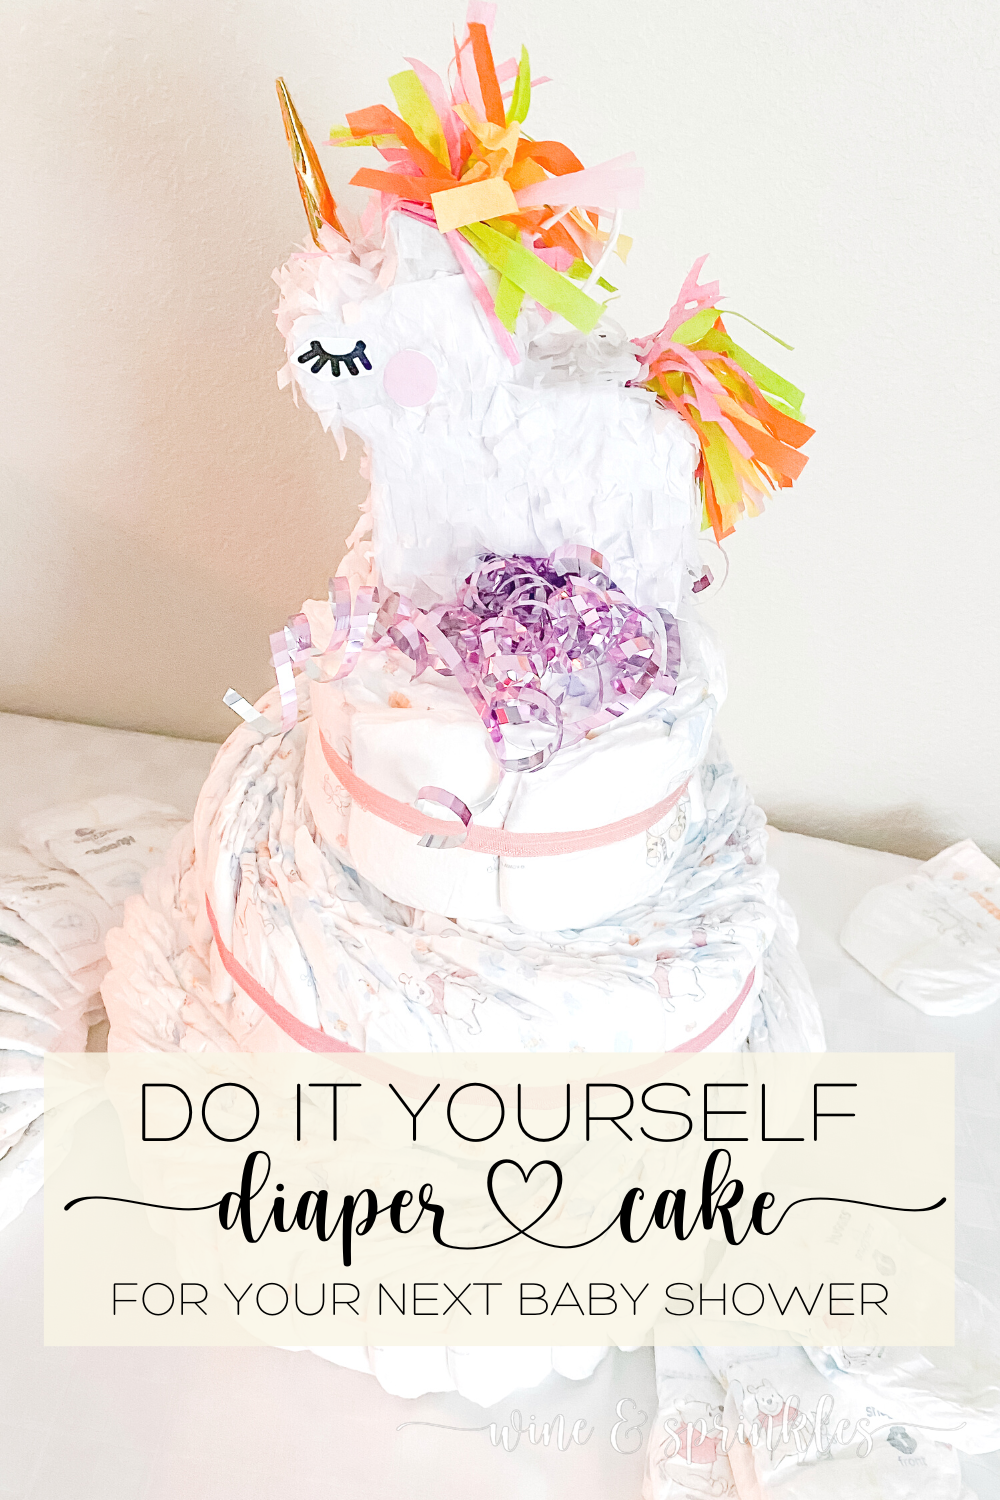
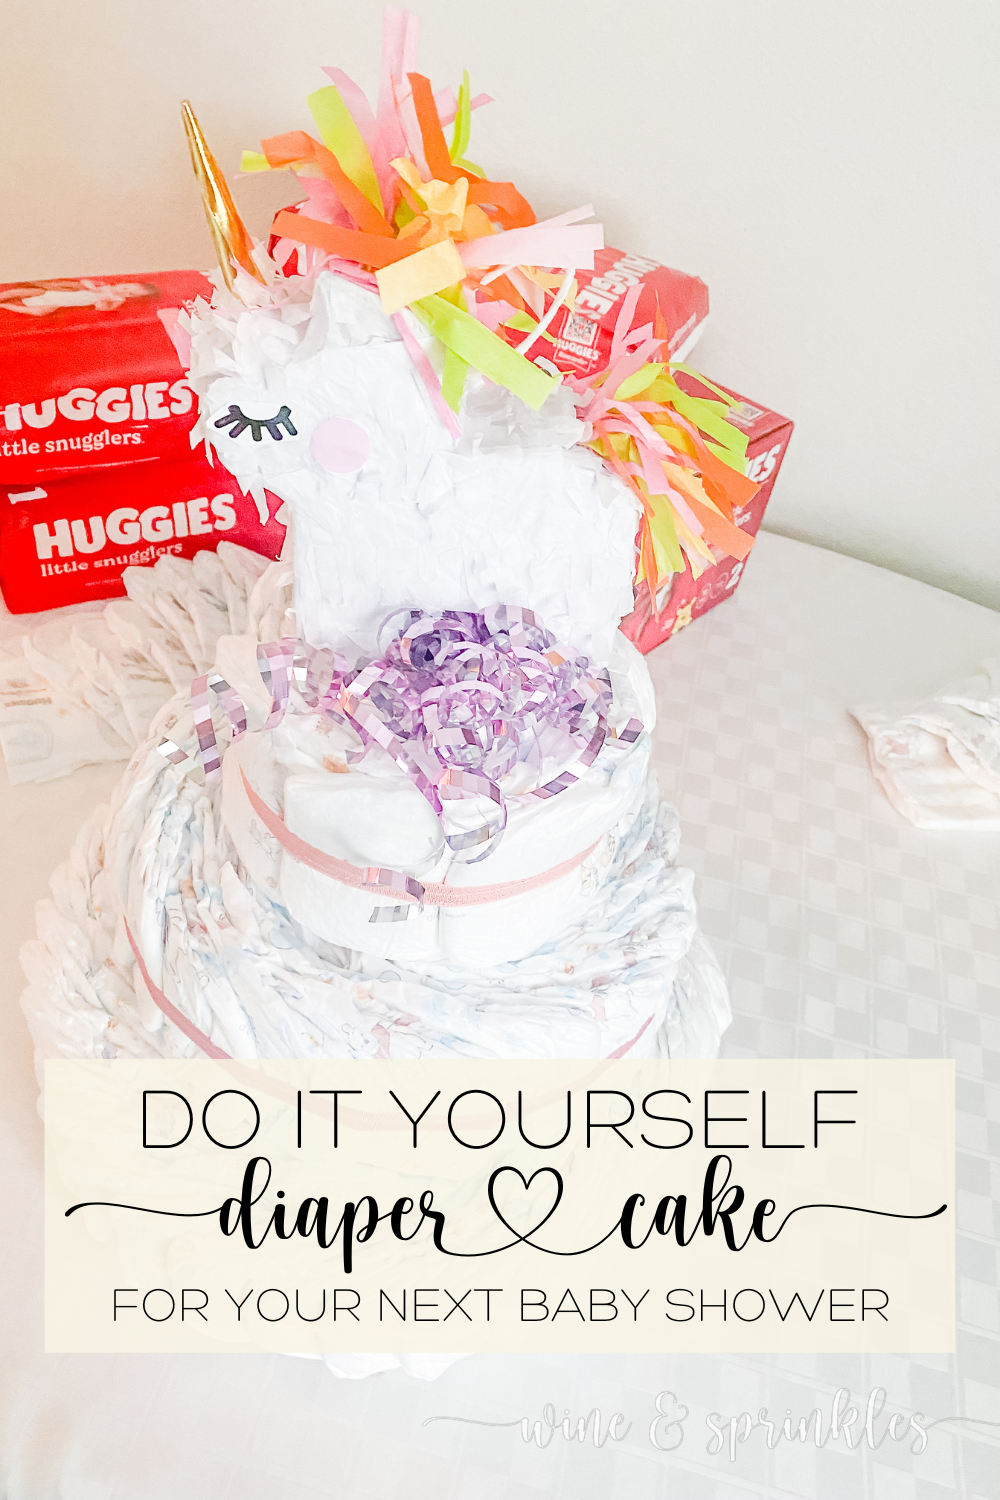
With this being my first diaper cake, I wanted to keep its decorations simple and opted for a cute unicorn piñata with a bundle or curly ribbon for the topper, but decorating your cake is so much fun! I’ve themed them with bibs, toys, and even humidifiers; so take this simple cake design and use it to create a custom decorated diaper cake all your own!
SUPPLIES
DIAPER CAKE SUPPLIES:
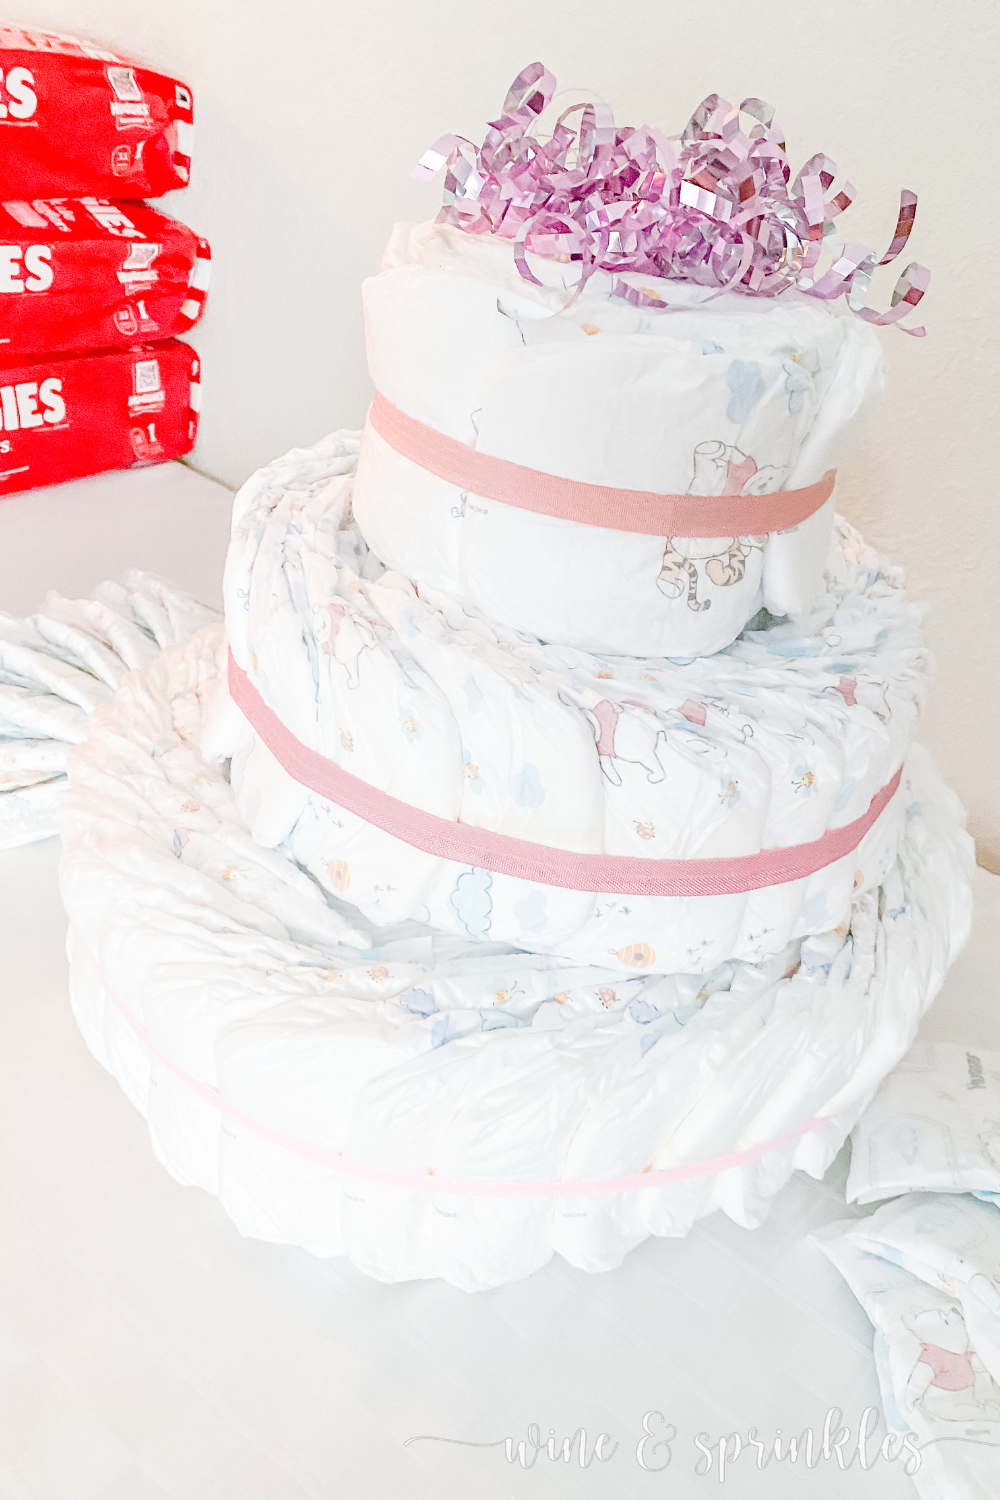
Diapers: as might be easily imagined, the most important supply for a diaper cake is, of course, diapers! It took 90 total diapers for my cake, though that number will change based on the size of the tiers you make and how tightly you can coil your diapers around each other. I bought both size one diapers and size two diapers, but the cake could be created with just one size. As I had many more size one than two diapers, they created the top and bottom tiers, with my size two diapers creating the center layer.
Elastic: to tie around the diapers to finish and secure each tier of you cake. I used longer pieces that came from a baby headband kit I used in a previous baby shower, then trimmed the ends after I tied it around my diaper tiers
Toilet Paper Tube: for creating a hole in the center of your top tier to use in securing your top cake topper and decorations.
Decorations for your Diaper Cake: the best part of diaper cakes are the decorations! While I used a small piñata that became a toy for the toddler in the house, I love using baby supplies as adorable and useful decorations on my diaper cakes! I’ve used baby bibs, toys, wash clothes, and other accessories as diaper cake decorations and love them all, the limit is your imagination!
SUPPLIES LIST:
[for 1 diaper cake]
Diapers x 90
(90 size 1 diapers & 36 size 2 diapers)
Hair Elastic x 3
Toilet Paper Tube x 1
Diaper Cake Decorations

DIRECTIONS
PART 1: CREATE THE TOP TIER OF YOUR DIAPER CAKE
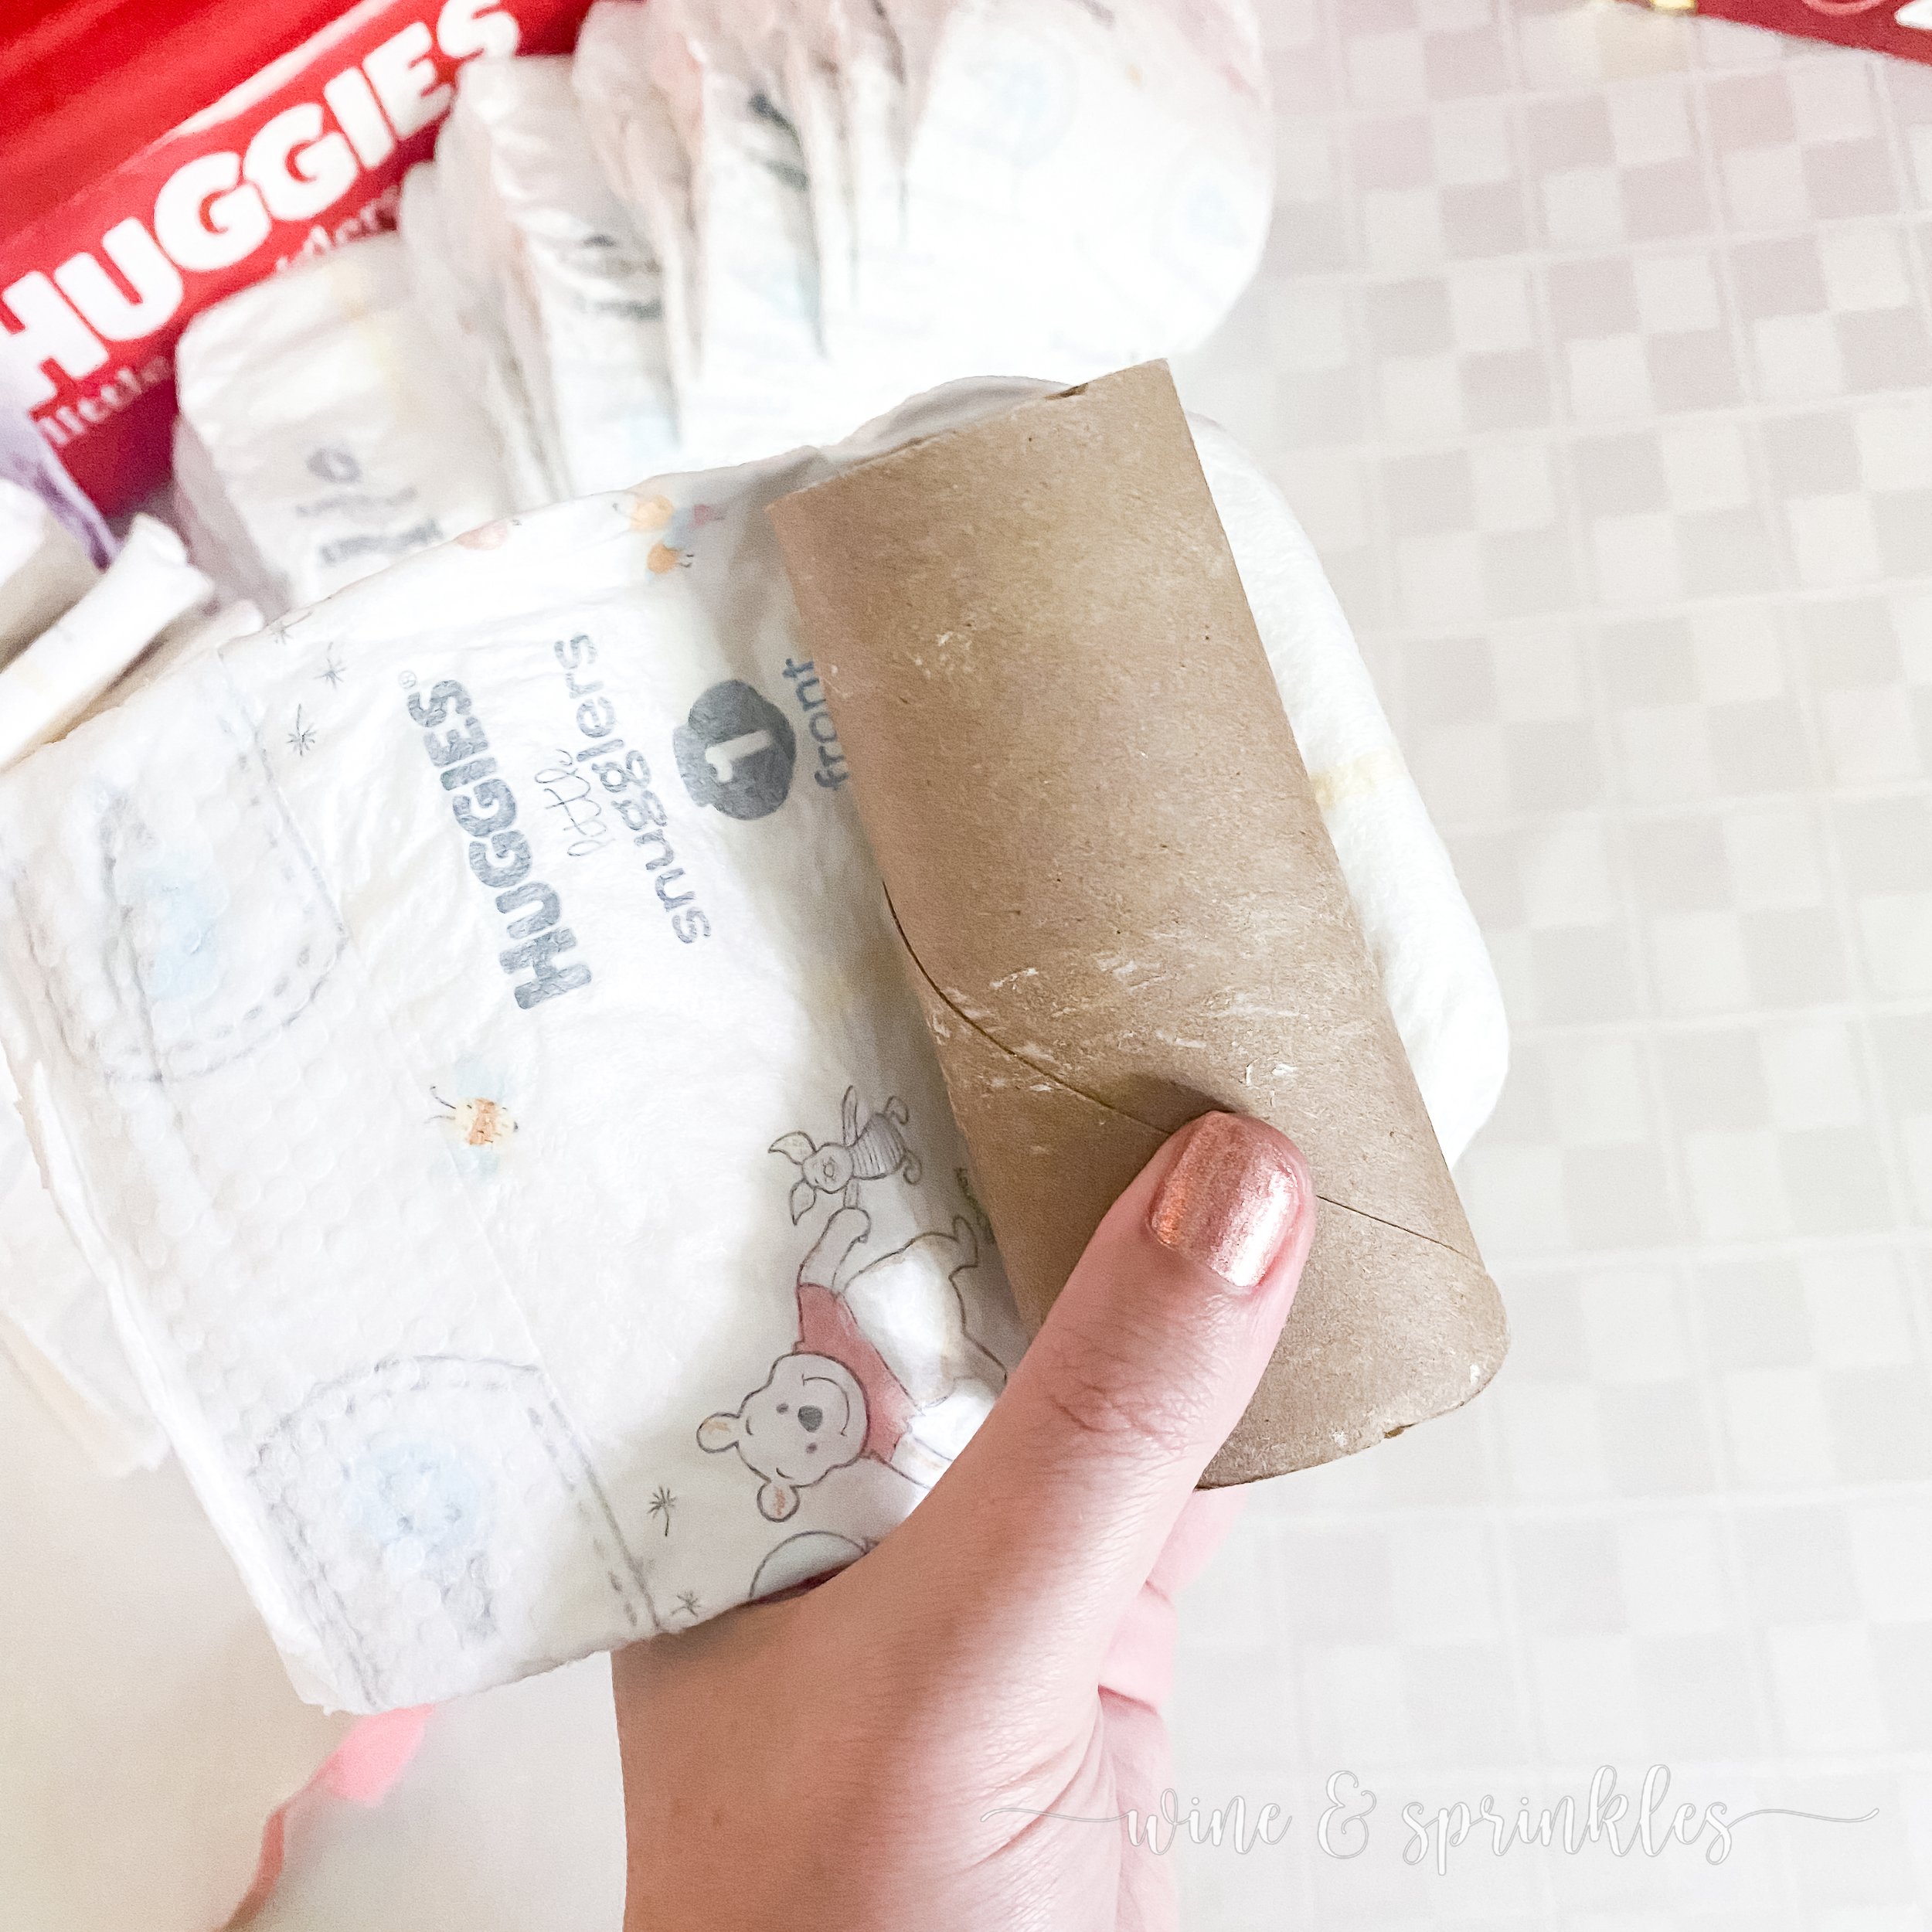
1. Starting with your size 1 diapers, we will create the top-tier of the diaper cake. Take a toilet paper tube, wrap a diaper around it, front side facing in towards the tube, and hold it against the tube to make the start of your tier.
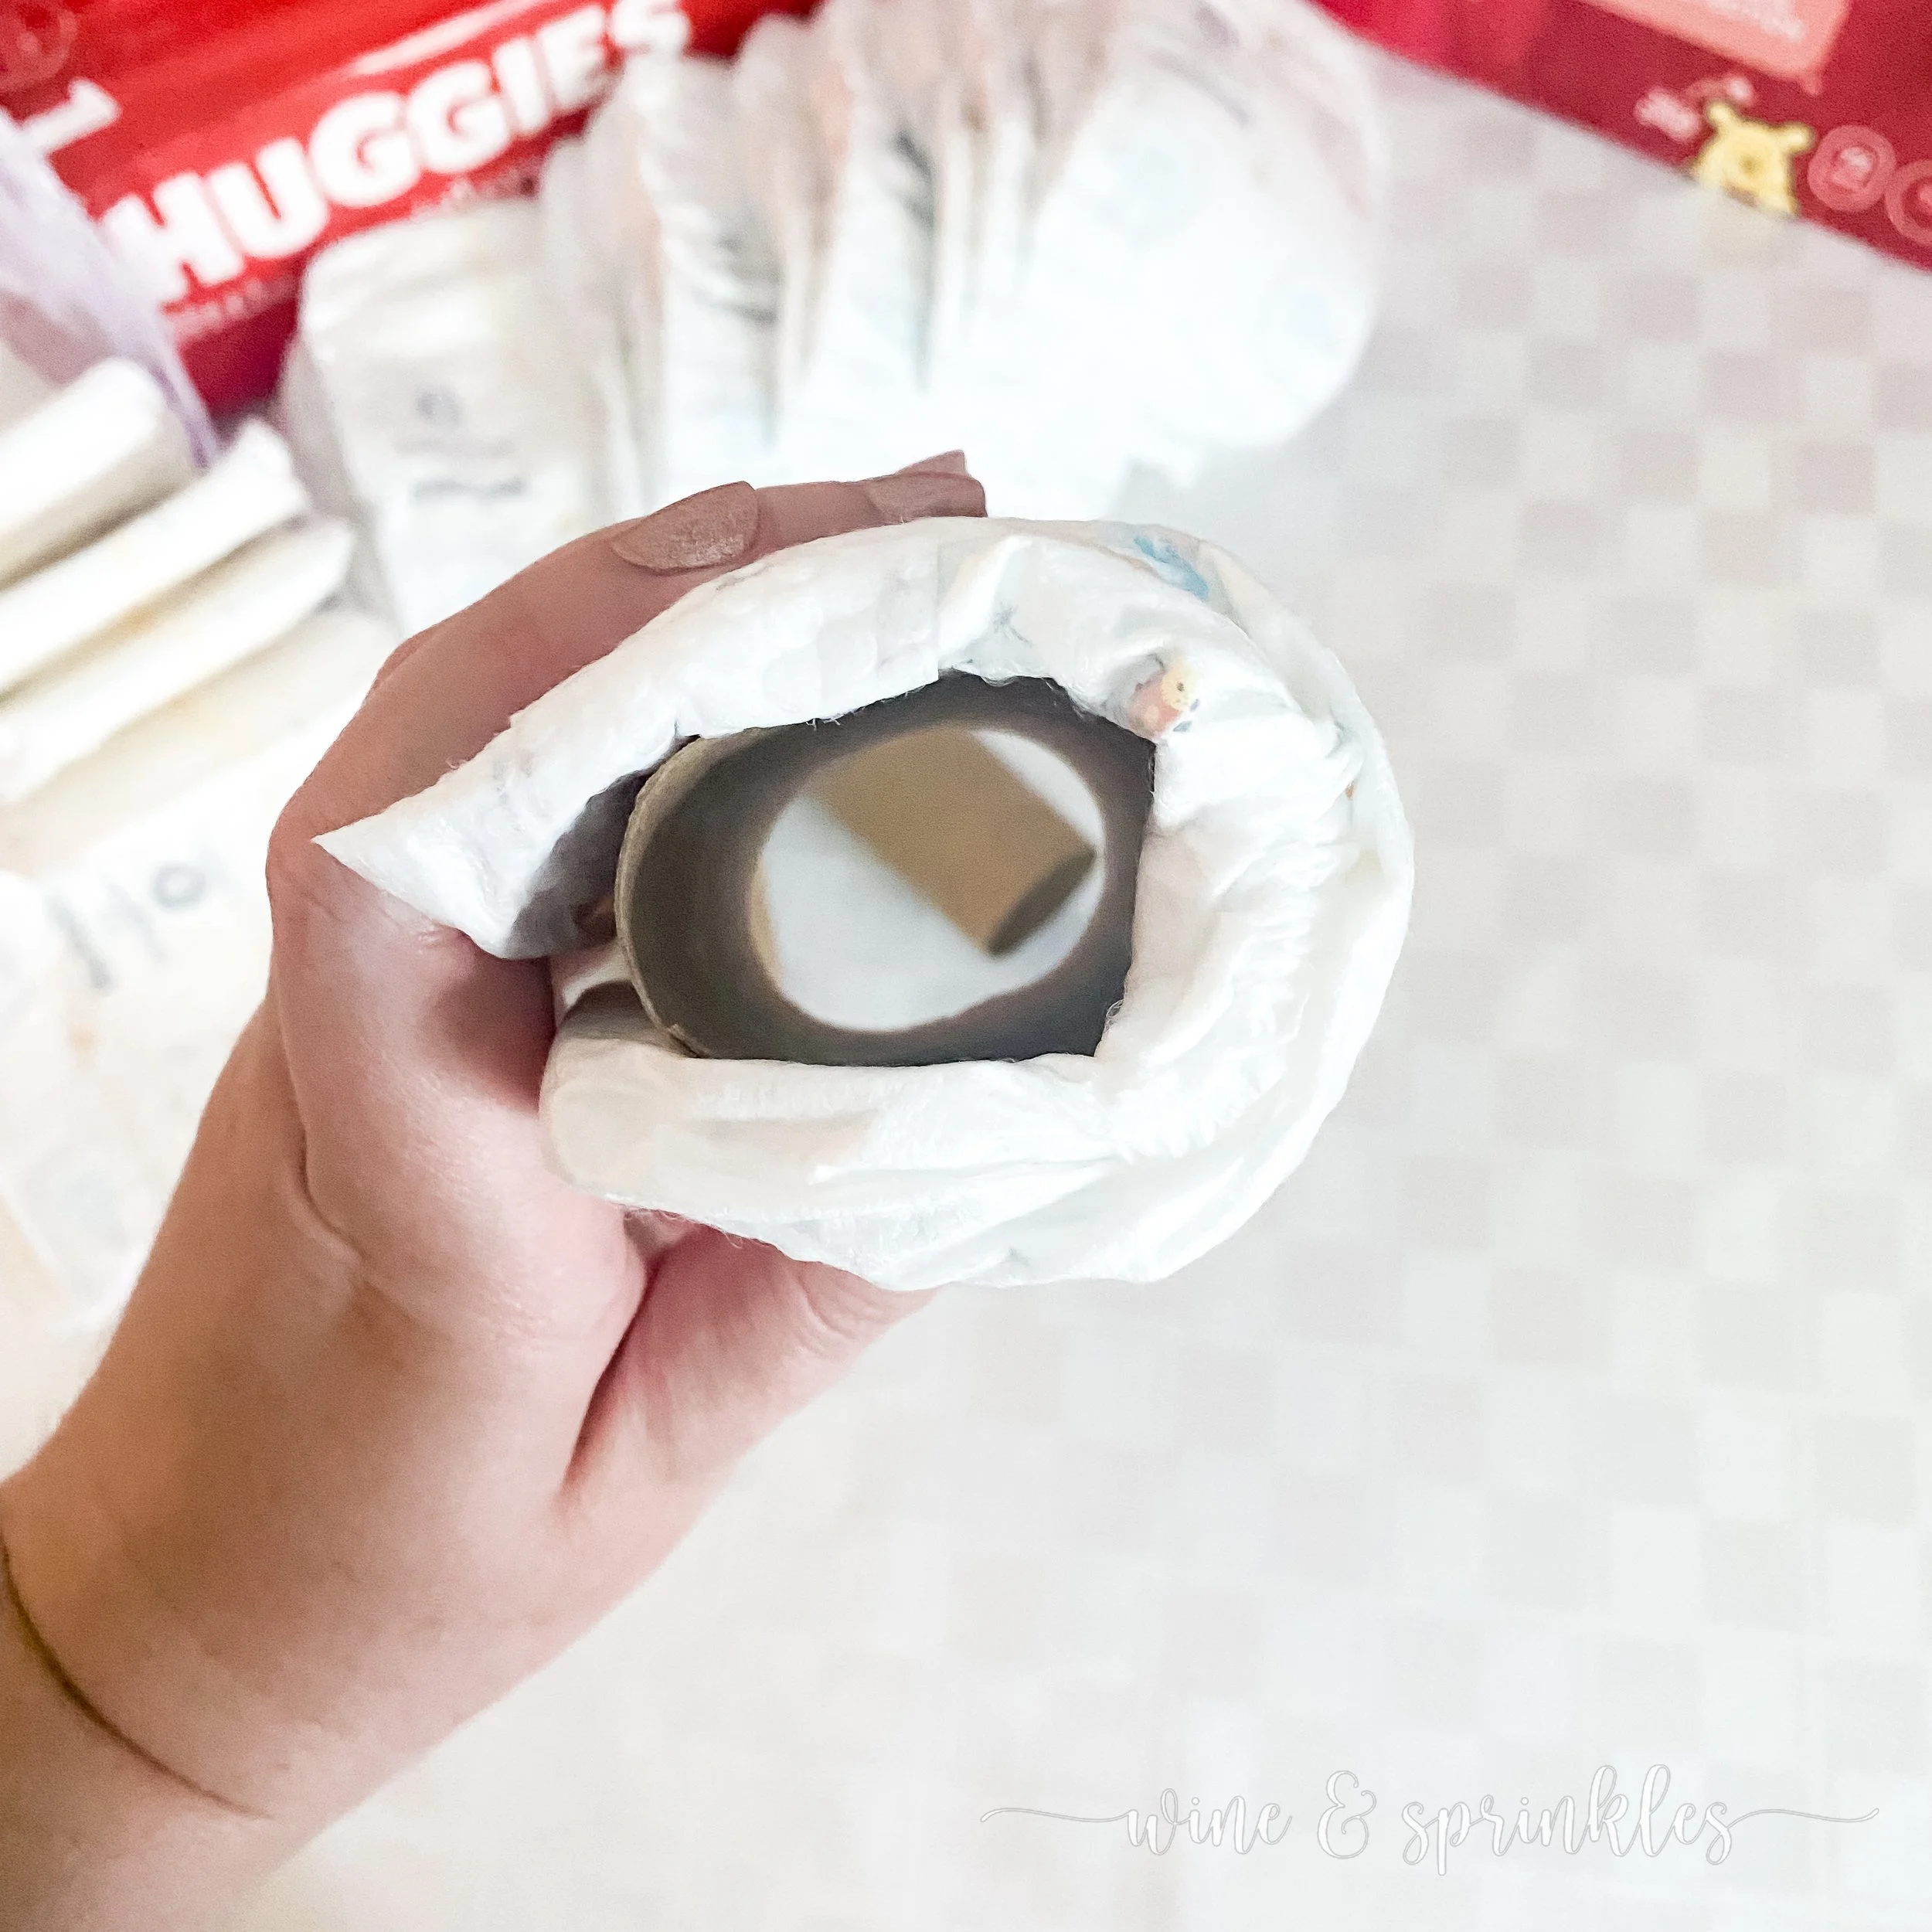


2. Overlap your next diaper, again front side in, over the previous diaper; about halfway up where you see a slight indent between the waistband and the bottom of the diaper. Wrap this diaper in the same direction as the first around your toilet paper tube, holding them against the tube with your hand.


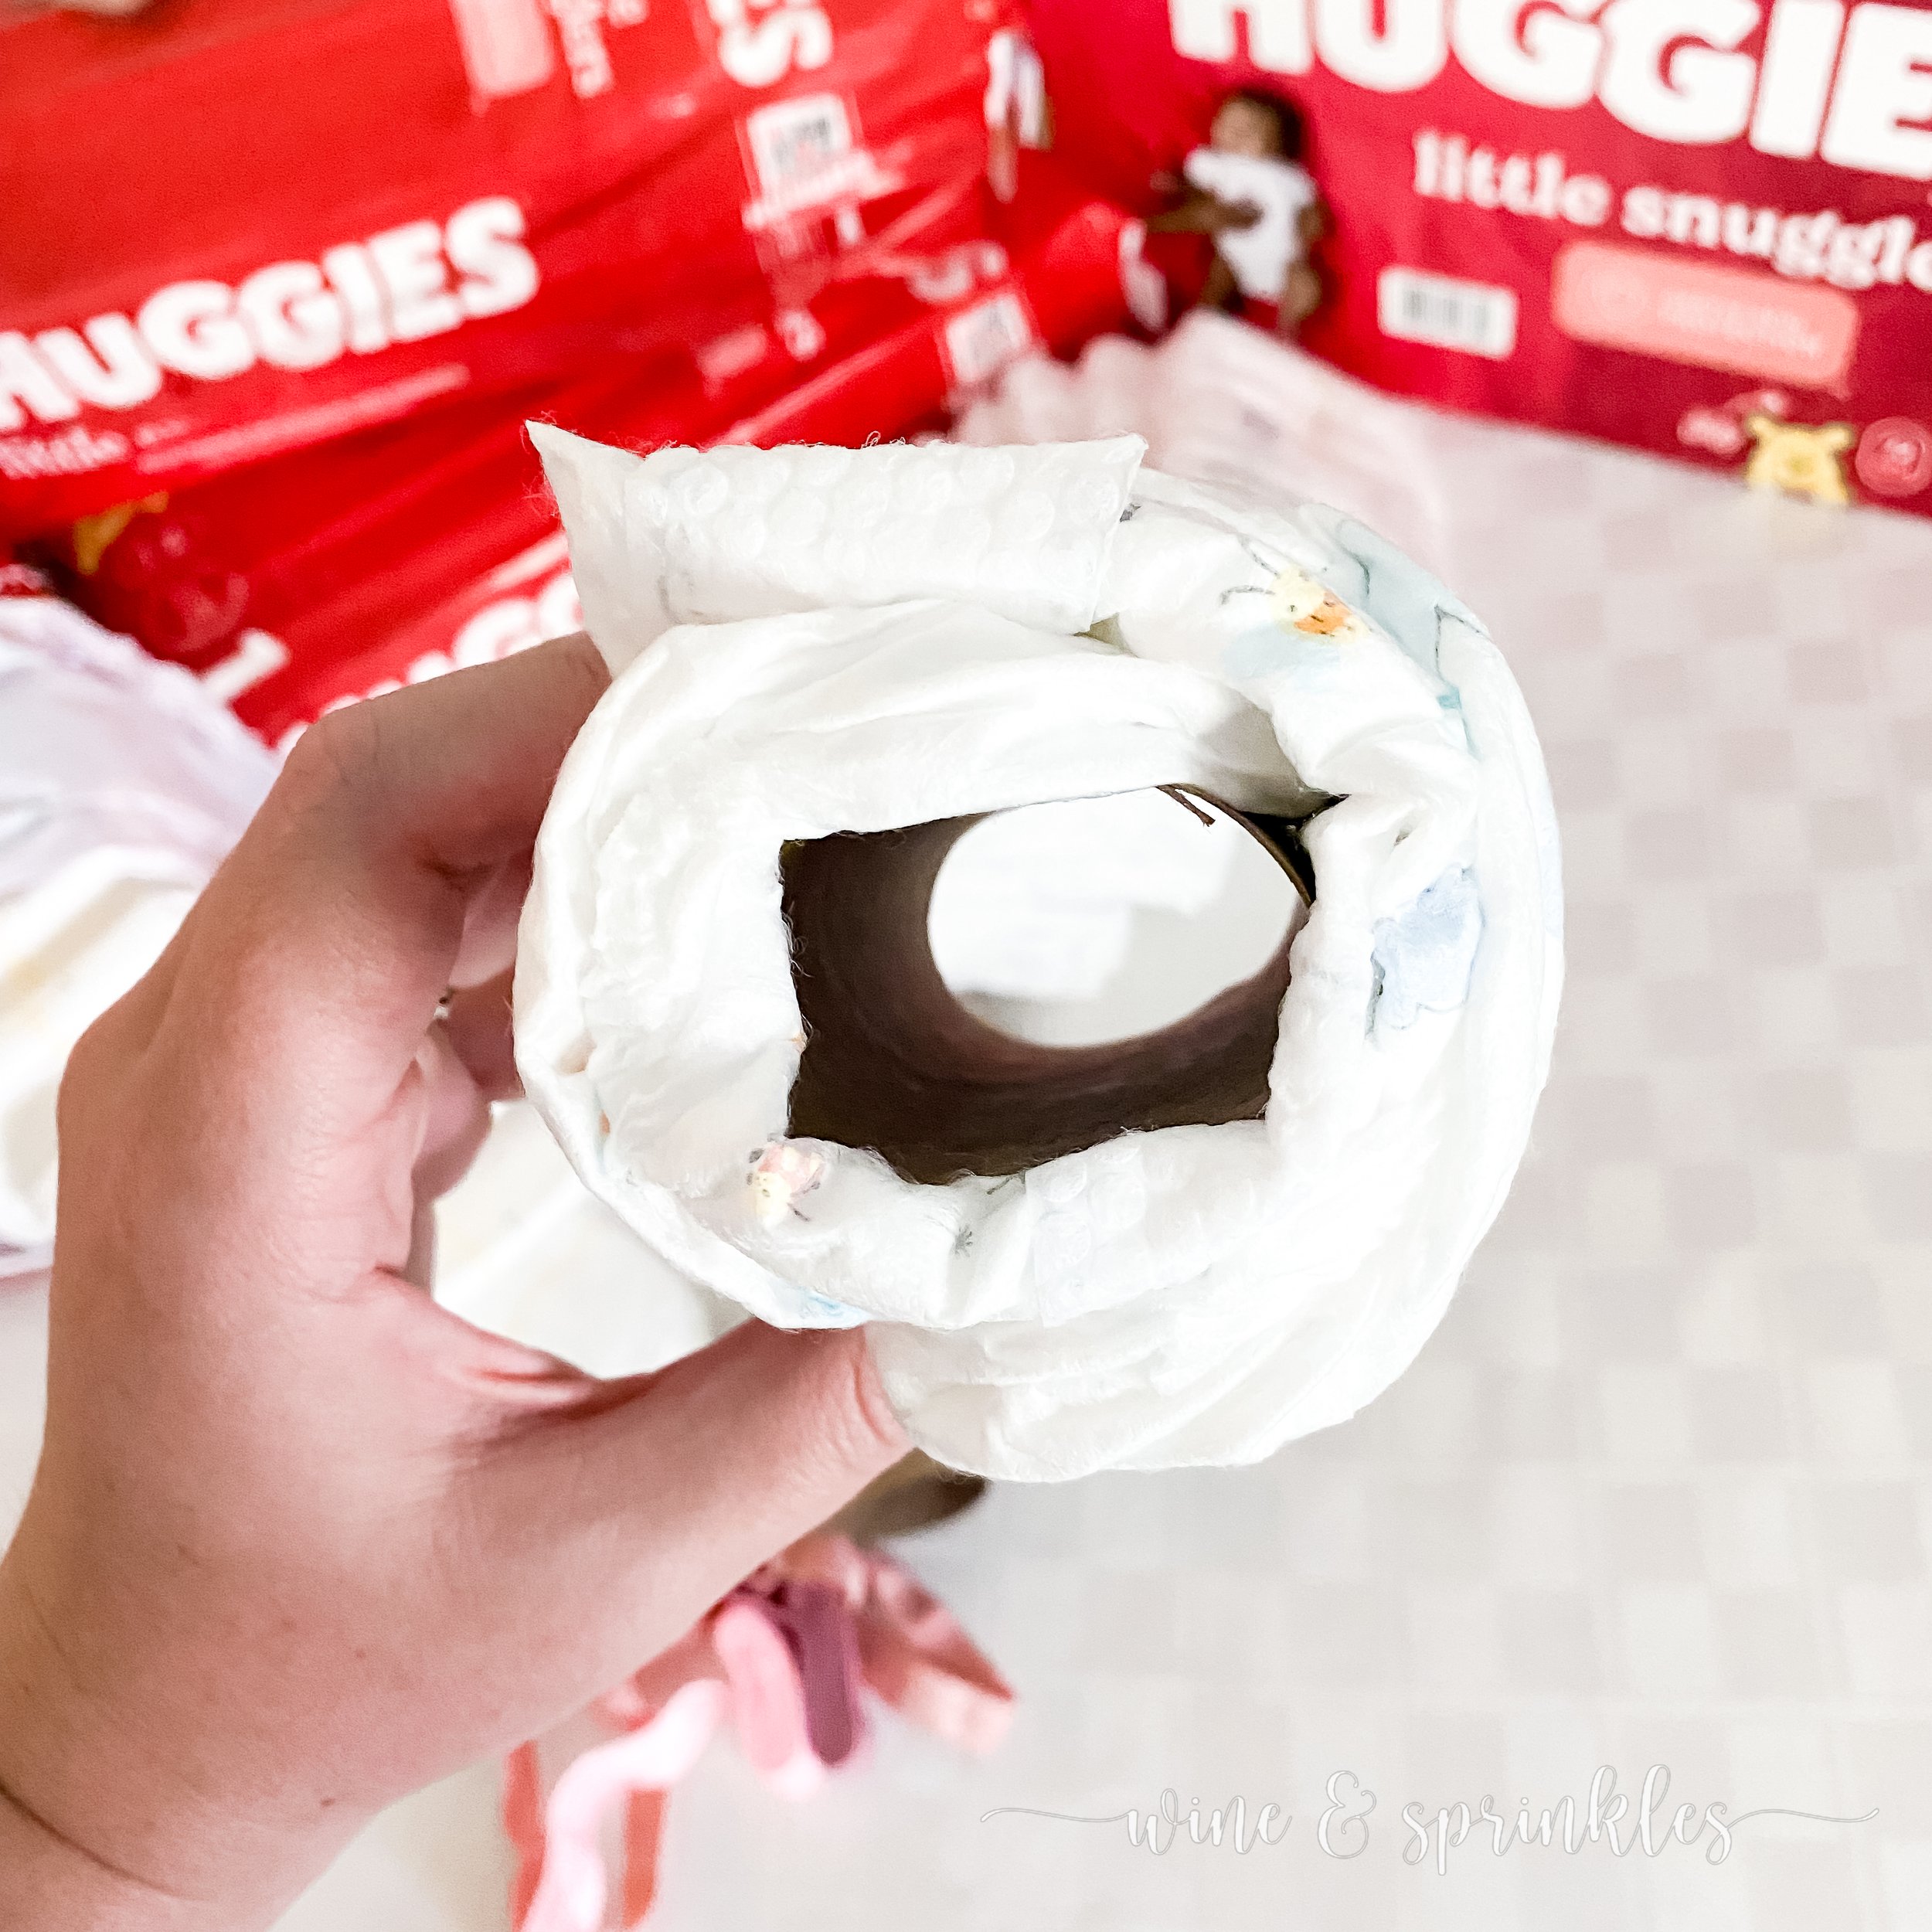
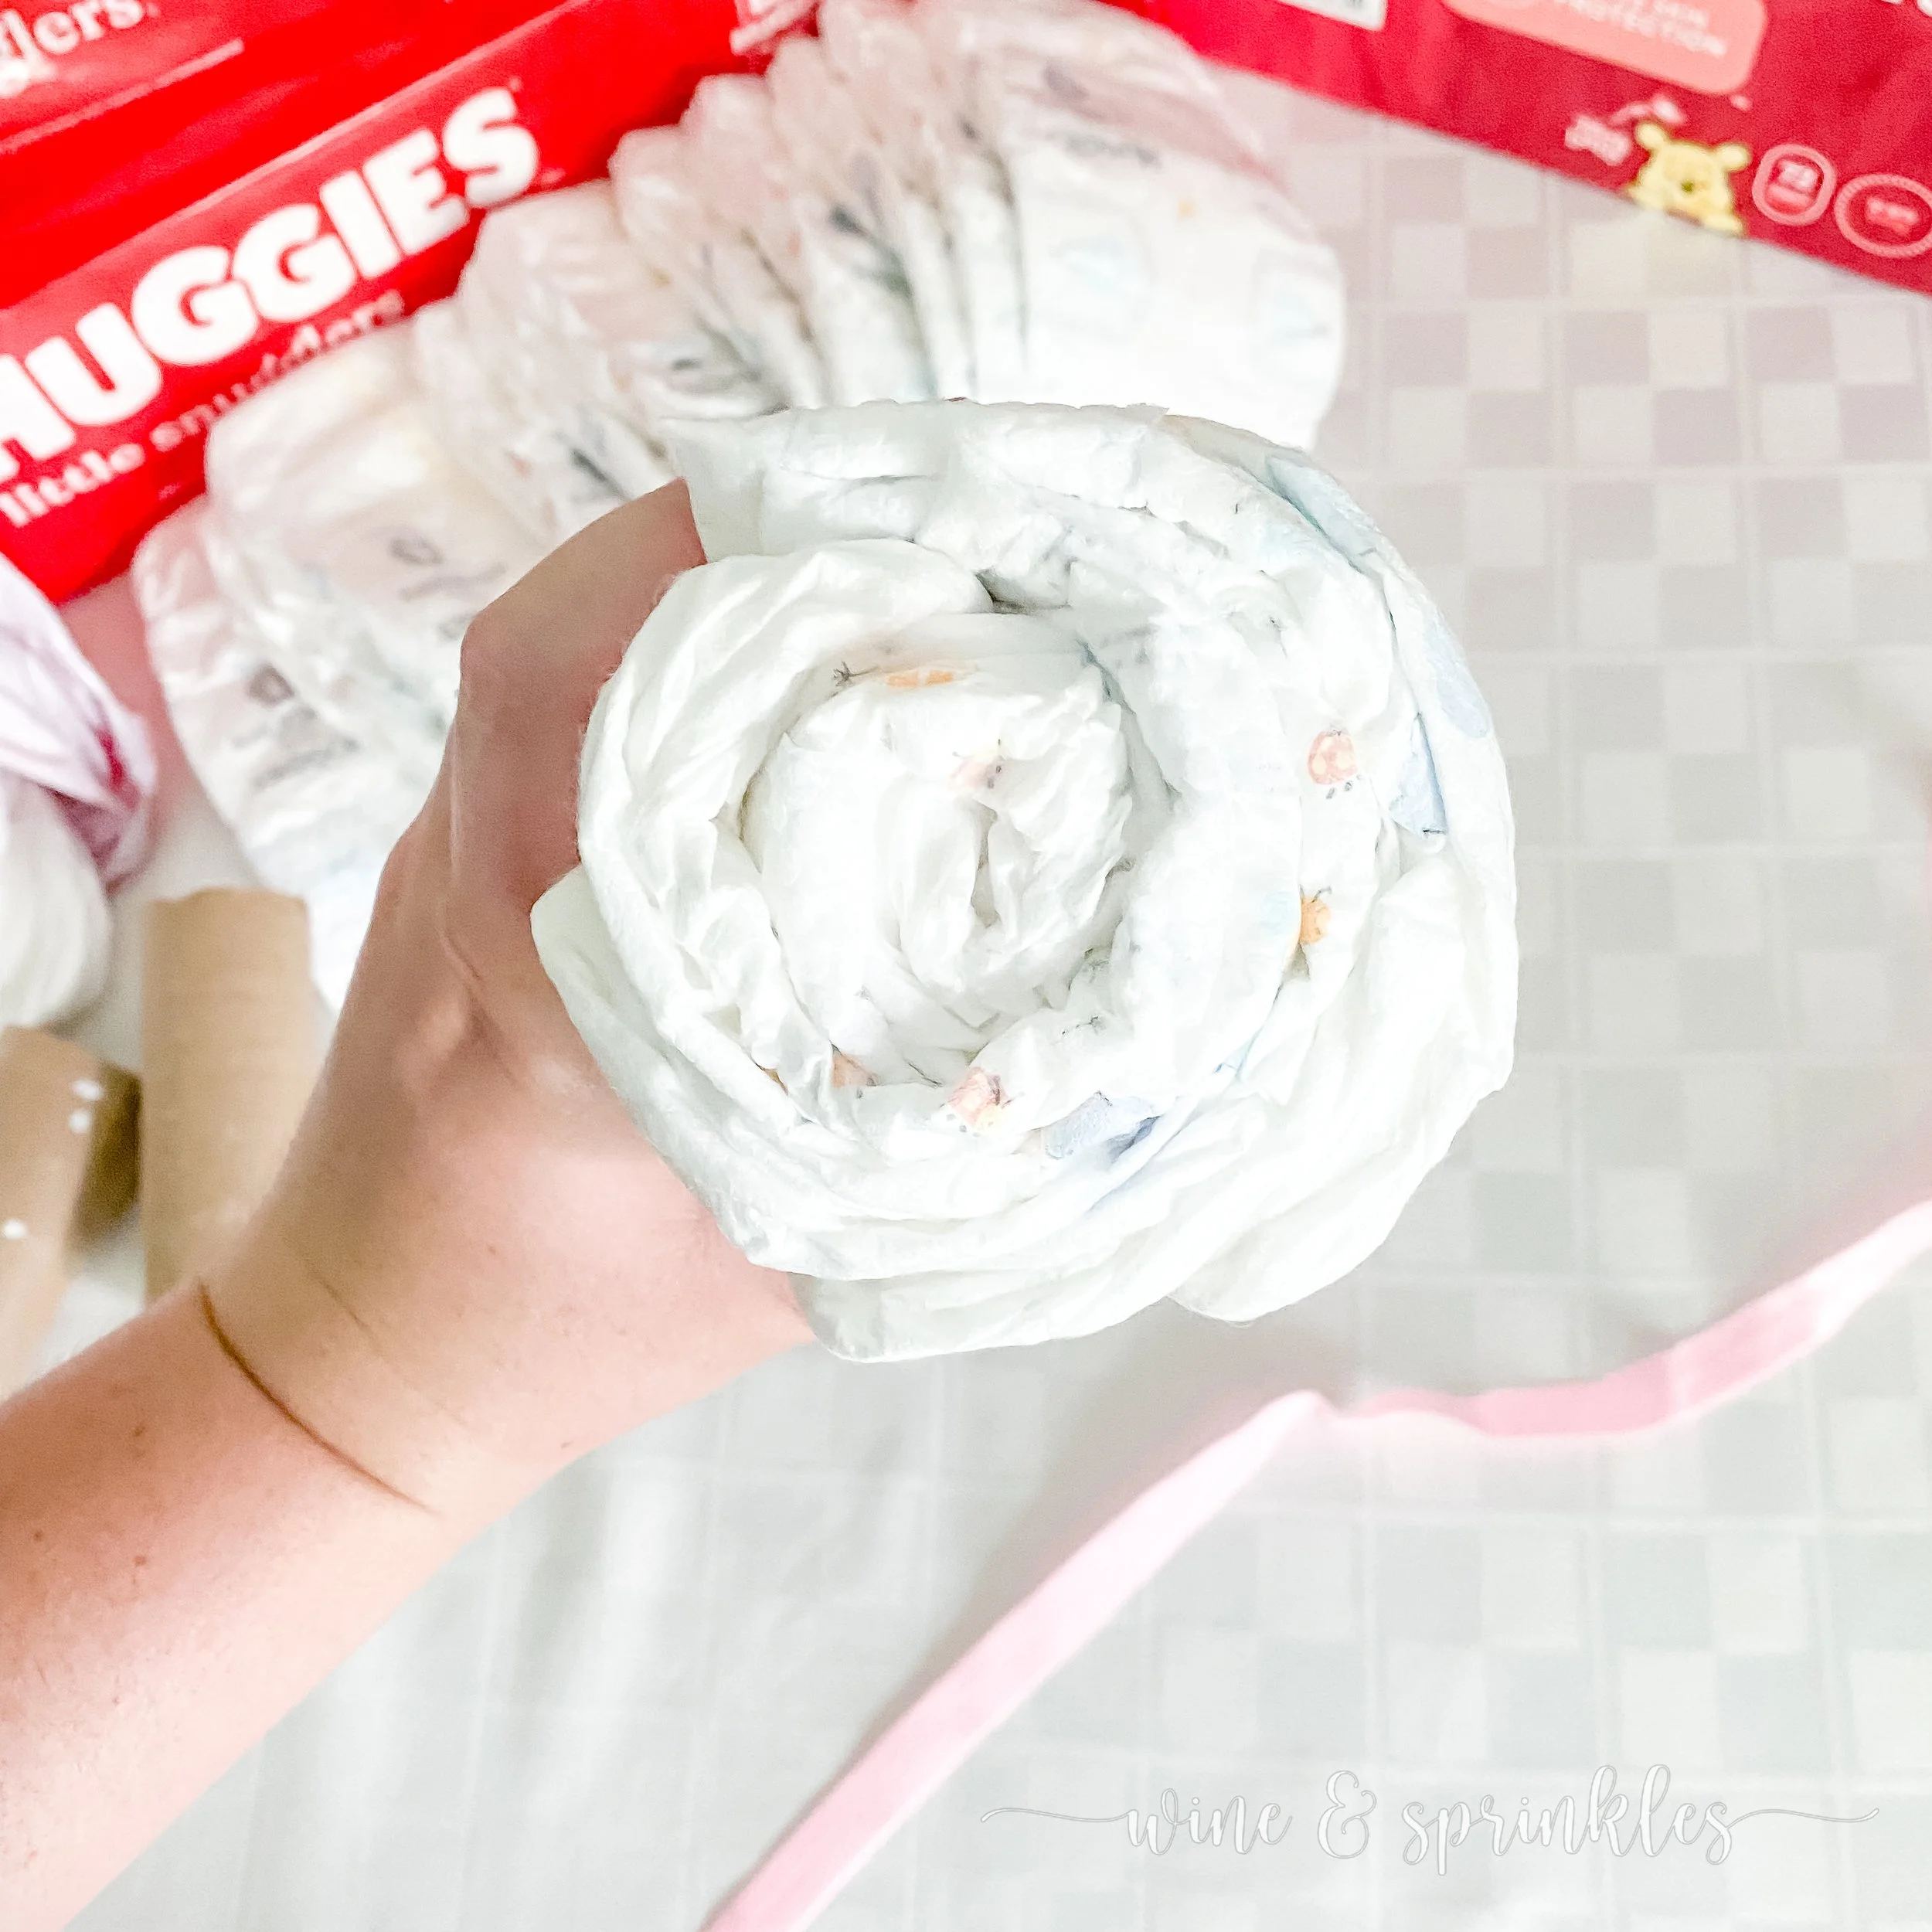
3. Continue to add diapers, front sides in as shown in the photos, overlapping about halfway for the first 5 to 7 diapers, then spacing them so that the overlap is about a third of the way away from the bottom of the previous diaper. Continue layering diapers around the tube until your top tier is as large as you like, for me it took 17 diapers. When you are ready to end the tier, tuck in the final waistband of your last diaper under the bottom of the closest diaper to it, then secure the tier together with elastic.

PART 2: CREATE THE BOTTOM TIER OF YOUR DIAPER CAKE
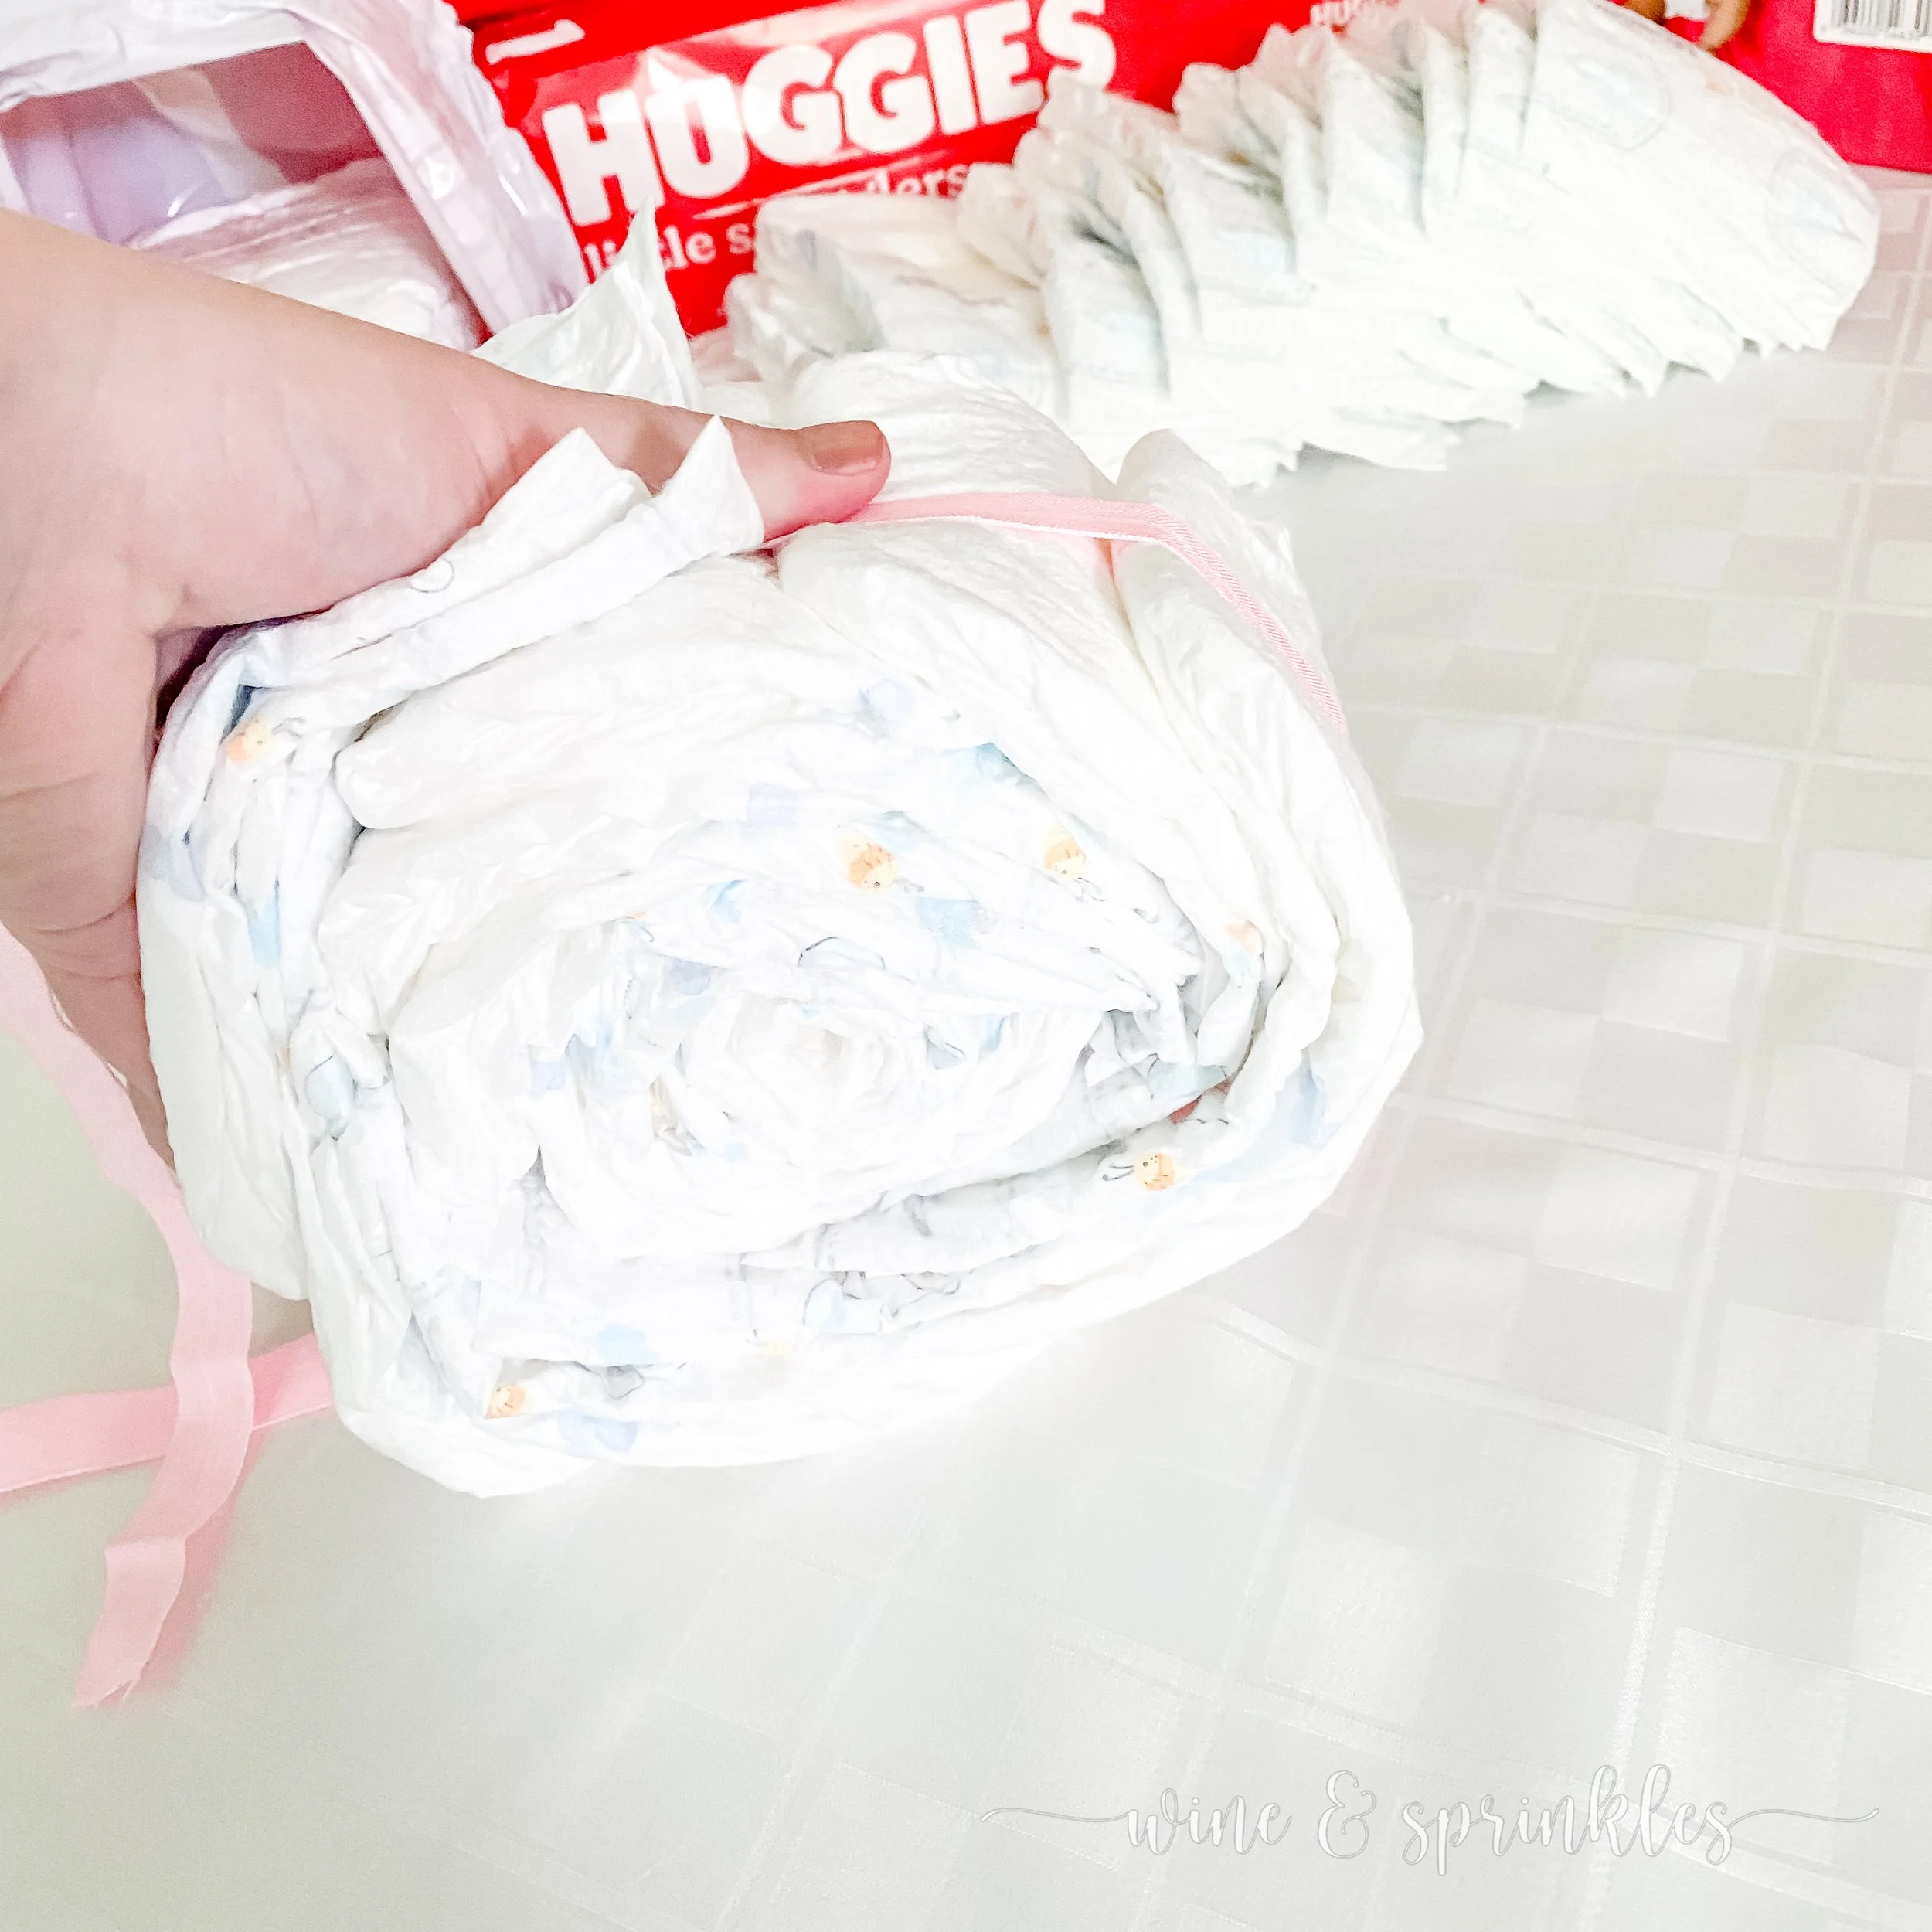
4. Next, use size 1 diapers to create the third tier, starting by making a second 17 to 20 diaper starting roll, just following the same procedure as in the first part, but instead using a couple rolled up diapers to start instead of a toilet paper tube. Instead of tying off the diapers, continue layering diapers to create the bottom tier of the diaper cake to the size you want.


Once the diaper cake tears get to about twenty diapers, I find it’s easier to add diapers by a slower rolling method. Turning the cake on its side, place the elastic you intend to tie it with under the diaper cake, along the direction you plan to roll and add diapers. Add the diapers with the bottoms facing you, slowly rolling the tier towards you, keeping the diapers coiled closer together while securing the rest of the diapers with your hands or by wrapping the elastic up around the tier when you need help securing it. Once you have rolled the cake as far as you can wrap the elastic around it to hold it more easily, then scoot it back to continue rolling it forward to add more diapers. Add diapers with this roll and slide method to add another 10-15 diapers to your cake, then it's time to finish the tier with the cake tied!


5. Once you’ve created a diaper cake of about 30-35 diapers, tie it together with the elastic you’ve been using to roll it, tying it just tight enough to gently hold the tier together but leaving slack to tuck in more diapers. Place the cake on your workspace, tier facing up, then continue building around your cake where you left off with sets of 3-4 overlapped diapers, rotating the tier clockwise while you work until the elastic is tight, for mine another 40 diapers for 70 total diapers in the bottom tier.


6. When you are done adding diapers to the tier, finish the tirer by tucking the end of your last diaper behind the bum of the outside layers of your cake so that all the diapers look equally spaced with the others on the outside, as shown in the photos.


PART 3: CREATE THE MIDDLE TIER OF YOUR DIAPER CAKE


7. Finally it’s time to make the middle tier of your diaper cake, which I generally make last so I can just add diapers until it’s equally sized between my bottom and top tiers. I used size two diapers here, but you could use extra size ones instead if you only want to buy one size!
Making the middle tier is essentially making another third tier, but smaller. Start by rolling your first 3 to 5 diapers to create a small cylinder, then use the same method as above, overlap diapers in stacks of 3-4 at a time, wrapping around the starting cylinder until you can secure it with loose elastic, instead tying it around 15-17 diapers in before it is too difficult to keep together with your hands. Add the sets under the elastic like the bottom tier until it is between the top and bottom tier sizes, for me 36 diapers total. Then, just like above, tuck in the tail of your last diaper so that all the bums are equally spaced around the outside of the tier


PART 4: STACK YOUR CAKE & ADD YOUR TOPPER


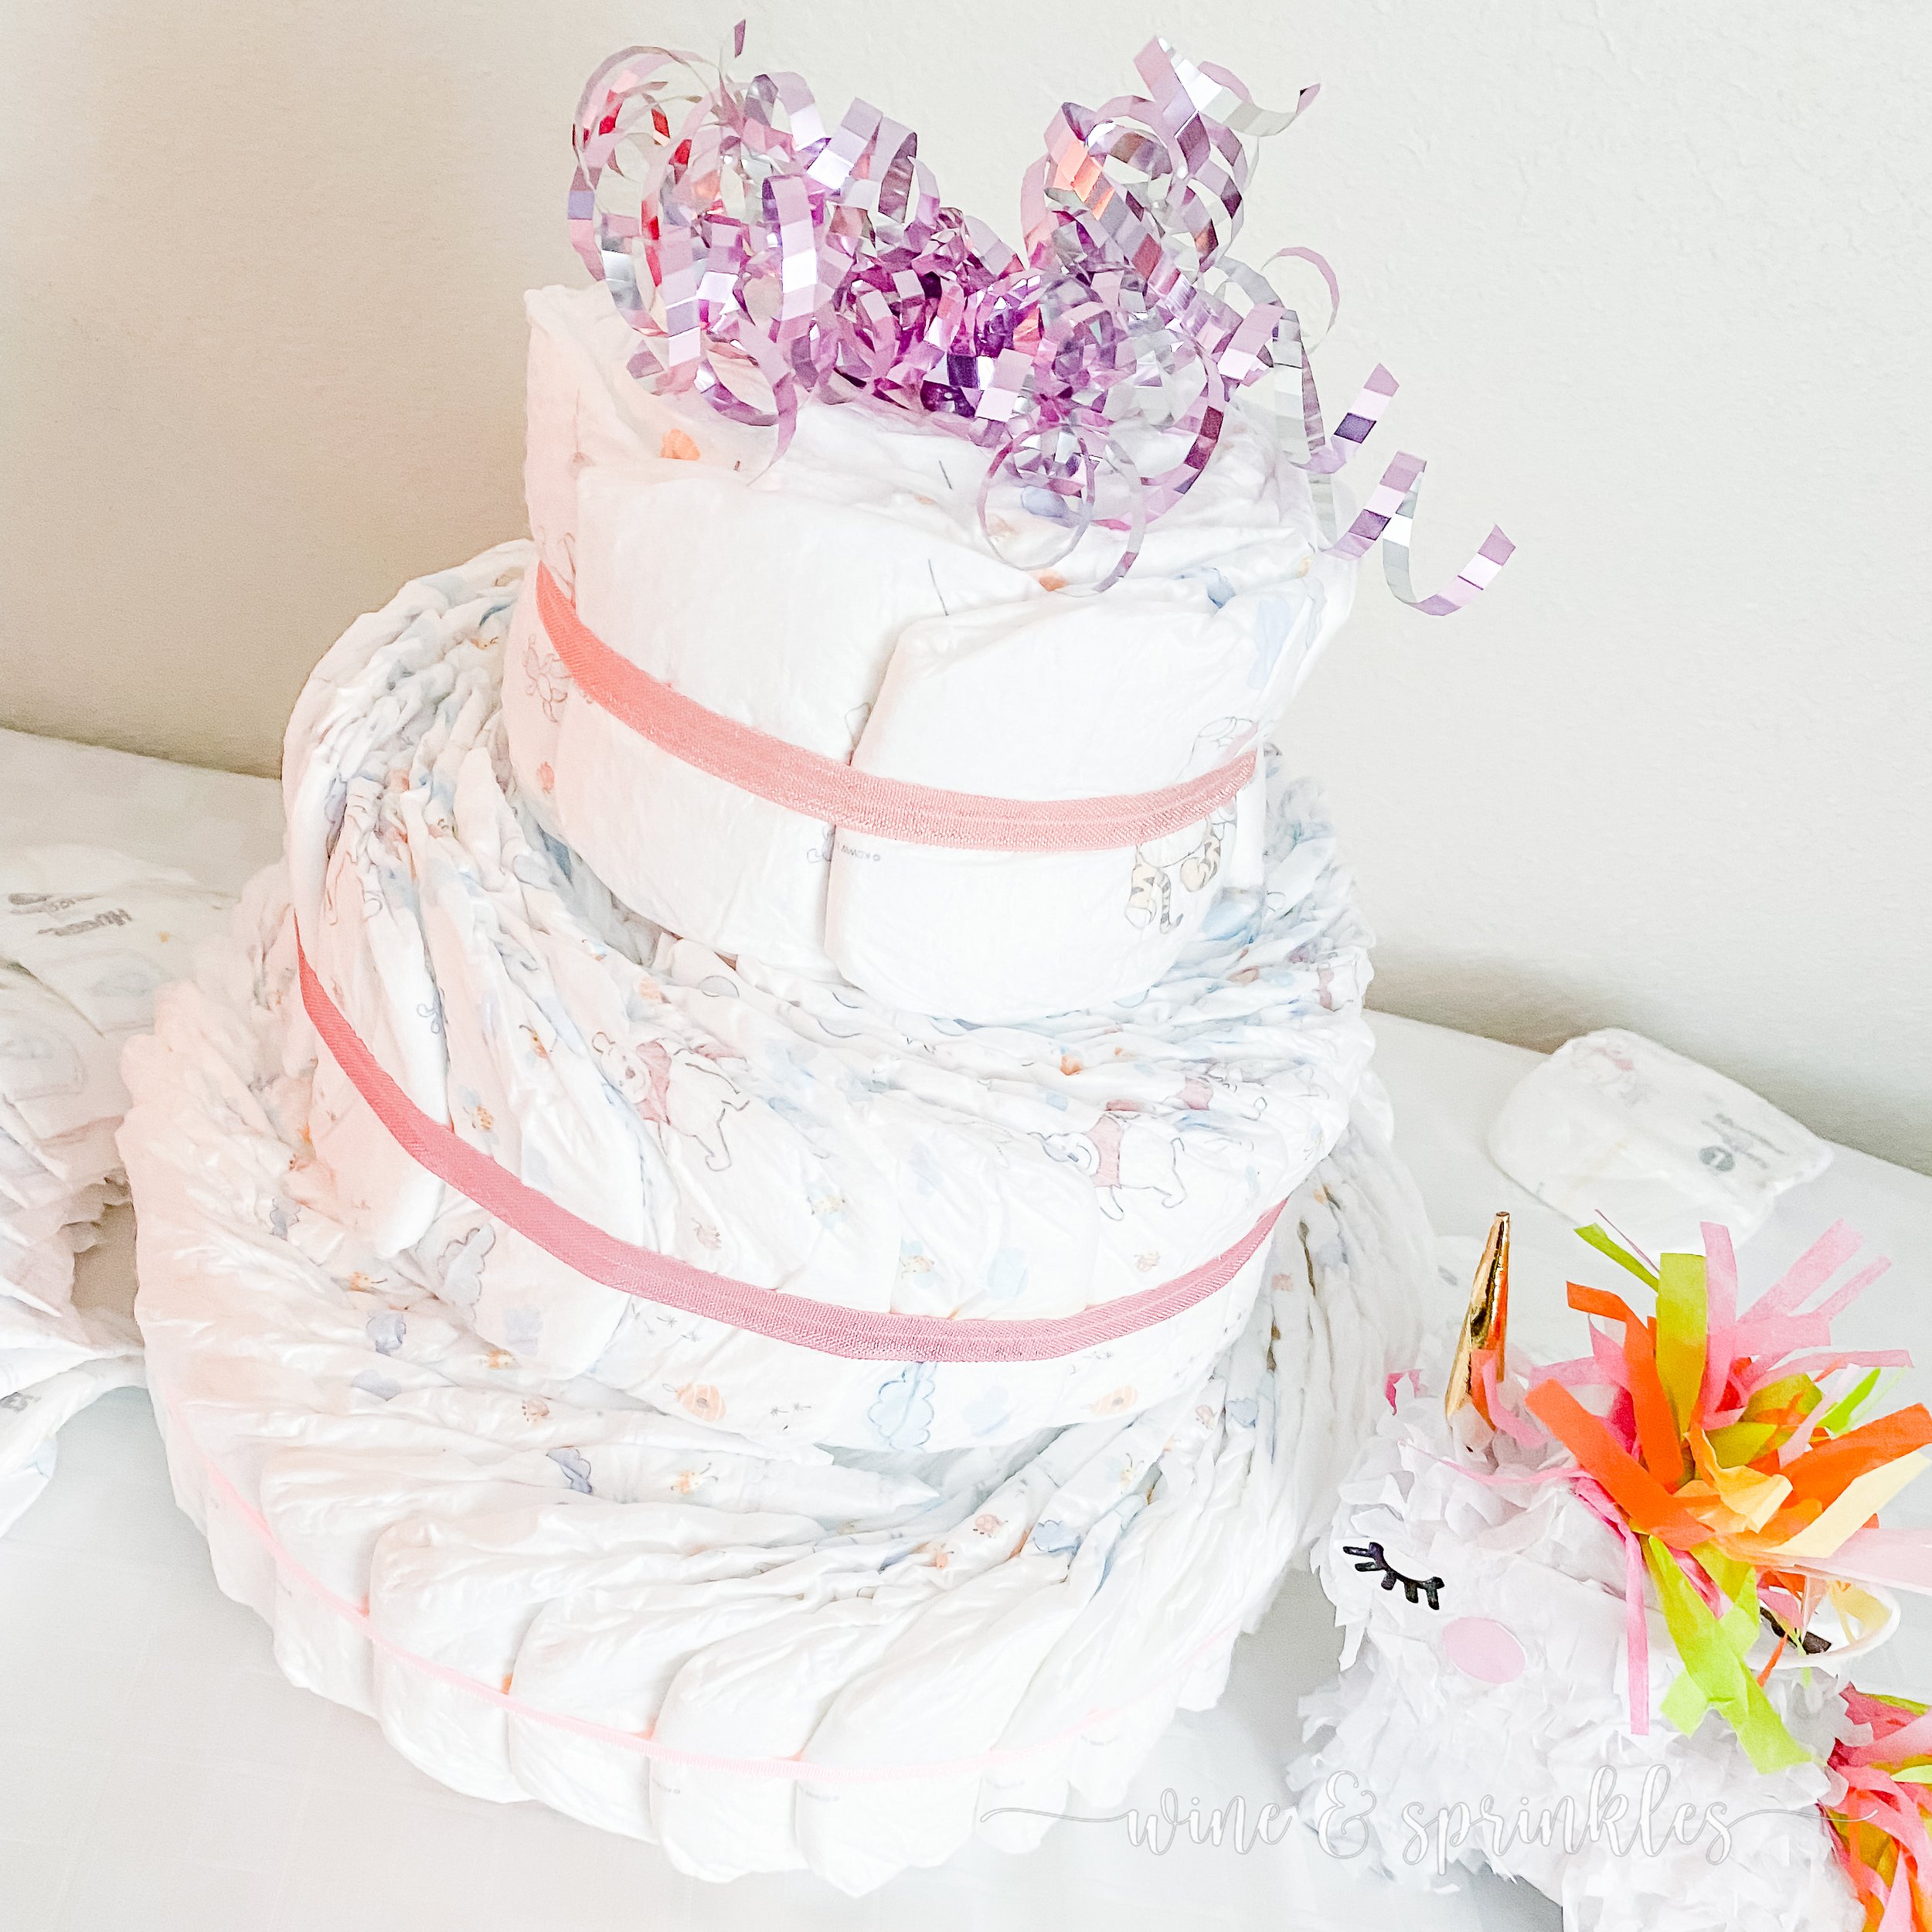
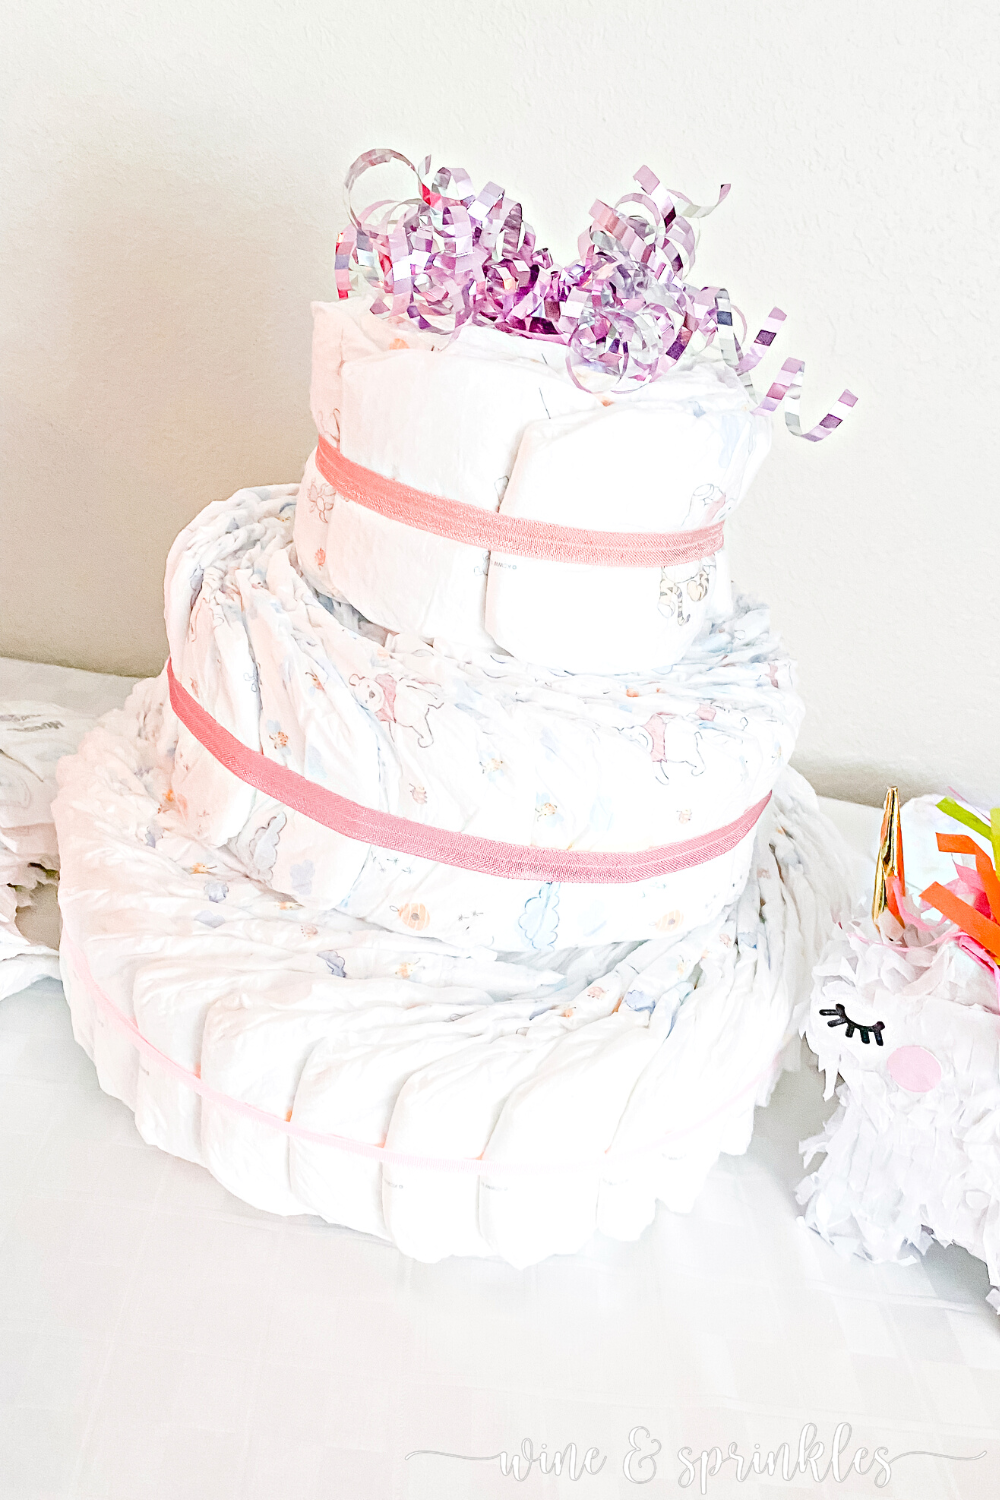
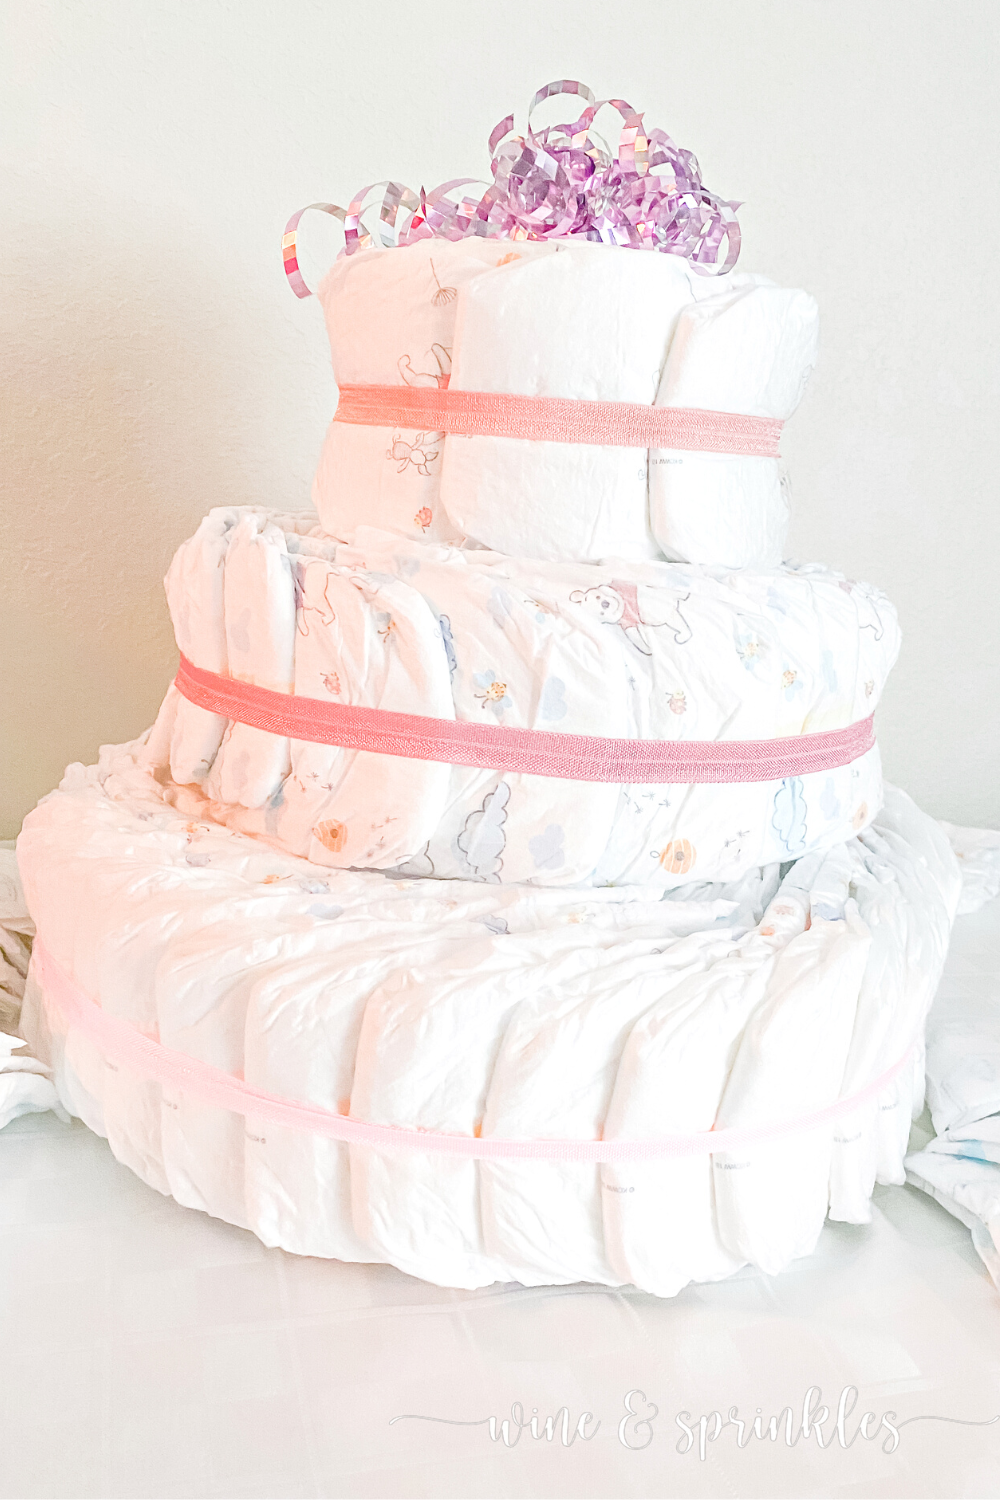
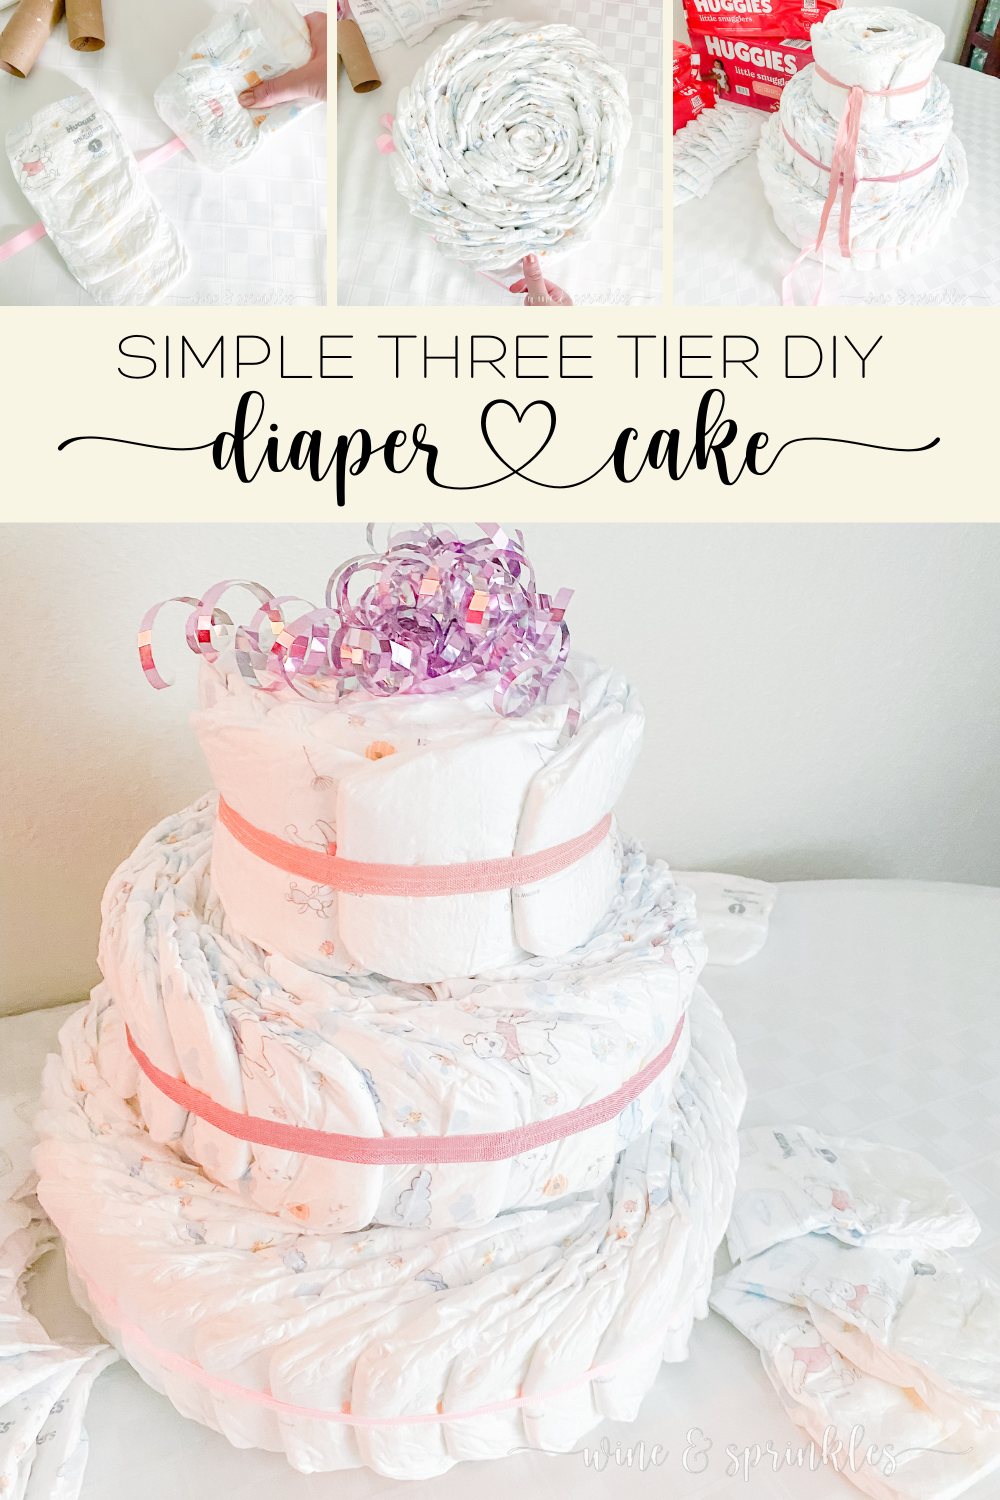
8. Stack each tier of your cake, largest to smallest, into a wedding cake shape (I put mine on a circular cake board to move it more easily after assembly). Face all your tiers so that the tied ends line up along the side you want to face the back and all elastic ribbons are flat and smooth.
9. Finally, finish your cake by tucking your topper into the toilet paper tube in the top tier of the cake. I found this mini pinata and curly ribbon worked perfectly, with the ribbon being secured inside the toilet paper tube and the pinata being secured in the curly ribbon on top!


This simply decorated cake is sure to be beloved, but feel free to add all the decorations you want to impress your mama-to-be with an over the top creation! As I continue to use this base to make cakes, I’ll be sharing my own designs and hope you come up with some marvelous custom cake creations all your own!
SEE OUR RELATED POSTS HERE:


OUR PINS FOR THIS POST:

OUR MOST RECENT BLOG POSTS:


Calling all Aires, Pisces, and every sign in between! I think astrology is super fun, which any of my guests who attended my Zodiac Summer’s Eve Party can attest, and I love to make fun zodiac themed gifts for my favorite friends that love it too! For those who don’t have the time or astrological inspiration to make their gifts, this guide is for you!