Hi Creative Mamas! I am super thrilled to share with you how to make a quiet book! This quiet book is very close to my heart because its a recreation of the book I used to play with when I was little.
When I was a child, I used to draw my own dolls. I used to give them names and make new paper clothes for them. Then, one day, I discovered that I could make flat felt dolls that resembled my paper ones. This was a huge discovery for me because fabric doesn’t break and my felt dolls would last way longer than my paper ones.
So, I made a collection of flat felt dolls. Every doll had several outfits. I used to have so much fun! Then another discovery! I made a very basic looking folder out of fabric that would hold all my felt dolls and their clothes. this was a game changer because I never ever lost a doll again!

Today, as a grown up woman I still love making flat felt dolls, love playing dress up with them and absolutely love making a quiet book for girls to use and play with. Let me show you how to make a quiet book for girls to play dress up dolls.
What is the difference between a quiet book and a fabric book?
A quiet book is a soft book made from fabric and its typically made for children to help them learn and play. Usually we consider quiet books to be interactive, they have some sort of activity for kids to interact with.
A fabric book is also a soft book made out of fabric but doesn’t necessarily include an interactive activity within its pages. It can be a memory book, a fabric collage book or a mini quilted book. Possibilities are endless. Check out this step by step tutorial on how to make a fabric book using upcycled fabric. You may also be interested in this tutorial that teaches you how to make a fabric book cover.
In this post I will show you how to make a quiet book which is specifically designed for girls. Its a dollhouse quiet book and its meant for girls to get creative by changing the doll’s clothes and becoming little designers.
How to make a quiet book tutorial
For this tutorial you need 3 flat felt dolls. To make the dolls please go to How to make a doll using Doll Patterns (Free) and follow the step by step instructions.
The doll patterns are super easy to use (available in my FREE RESOURCE LIBRARY— get the password for free by filling out the form below). You just need to download the PDF patterns and follow the tutorial instructions :).
This post contains affiliate links, which means I receive a small commission, at no extra cost to you, if you make a purchase using this link. Please see my disclosure for more details.
Materials and Equipment
- Sewing Machine
- Iron
- Flat Felt Doll Patterns (available in my FREE RESOURCE LIBRARY— get the password for free by filling out the form above)
- 100 % cotton batting (I love this brand!)
- Cotton scraps at least 12 inches by 12 inches
- Tie dyed cotton fabric
- Felt fabric
- Velcro
- Mini Wooden pegs
- Adhesible fusing and I am using HEAT & BOND lite
- Cutting mat
- Rotary cutter
- Fabric scissors
- Quilting Ruler
- Embroidery thread
How to make a Quiet Book using free doll patterns
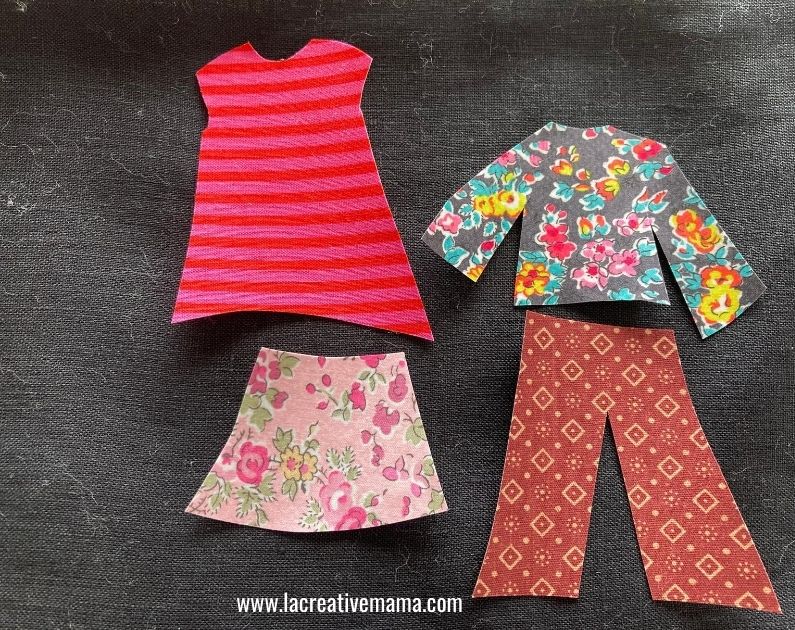
The starting point for this quiet book tutorial is to make the flat felt dolls and a few garments first. So your starting point should look like the illustration below 🙂

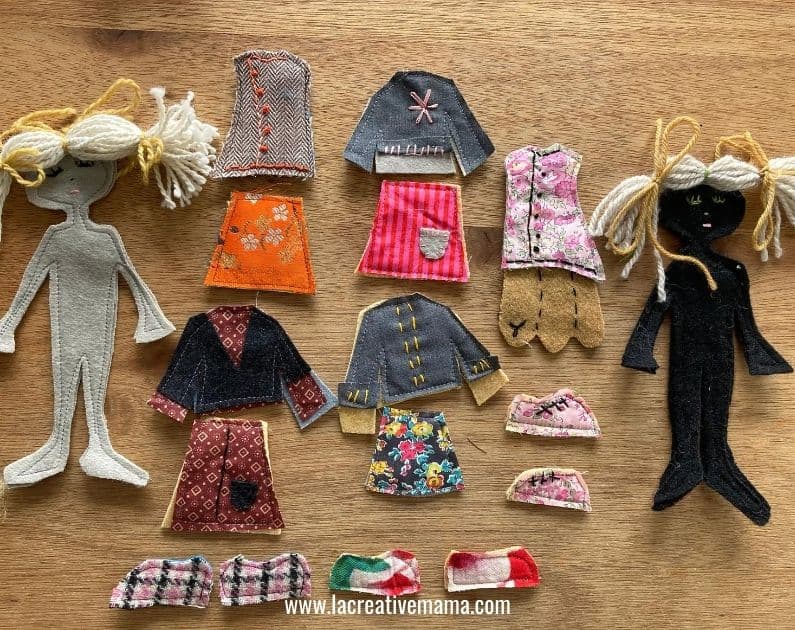
Once you have the dolls made up you can start making the quiet book 🙂
Step 1
Using your rotary cutter and your cutting mat, cut 8 pieces of fabric 11 inches by 11 inches. Make sure you use your quilting ruler to ensure the panels are the correct measurements.
For this tutorial I have used:
- 2 pieces of 100 % cotton which I have tied dyes using natural dyes. Read the tutorial here.
- 2 pieces of upcycled 100 % cotton (pink) from my fabric stash
- 4 pieces of 100 % wool suiting fabric which was left over from a pair of pants I have recently made
It’s important to use natural fibers since we are going to be using applique and we will use a hot iron on top of our fabrics. If we use synthetic fibers we can melt them. If you want a quick way to know what fibers are natural and which ones are not check out how to do a Fabric Burn Test here.

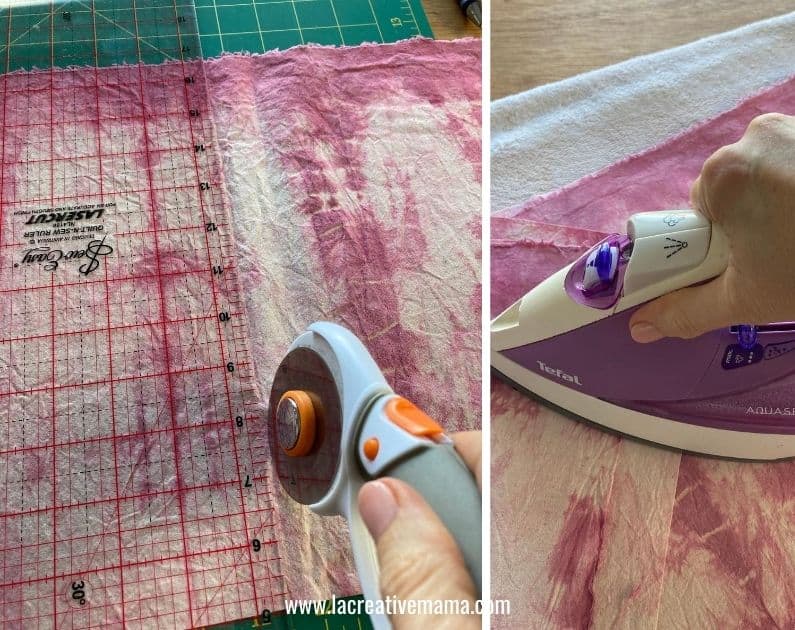
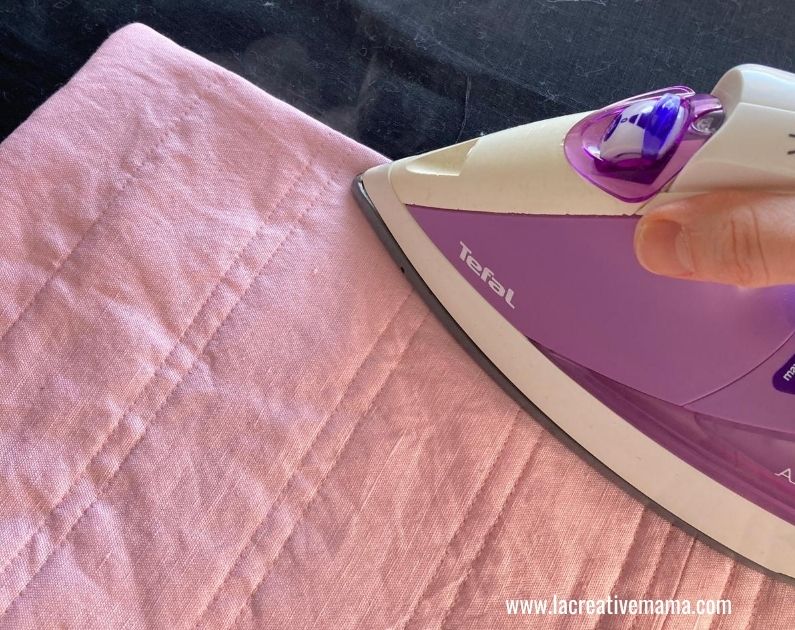
Press the fabric panels flat.

Step 2
Pin 2 panels together. You will have 4 double pages in the final book.
For this tutorial I kept it super simple and I used the two tie dyed panels together, the two pink panels together and the 4 black wool panels together as well.

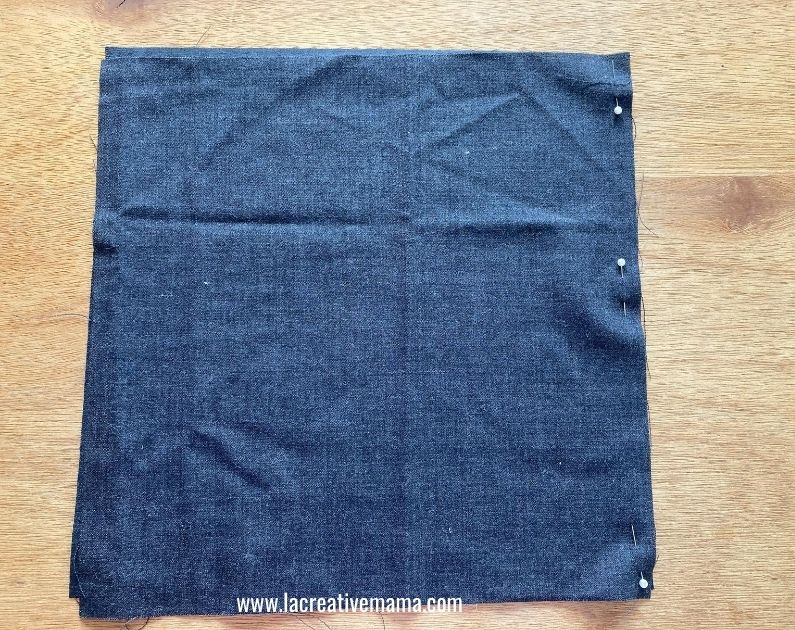
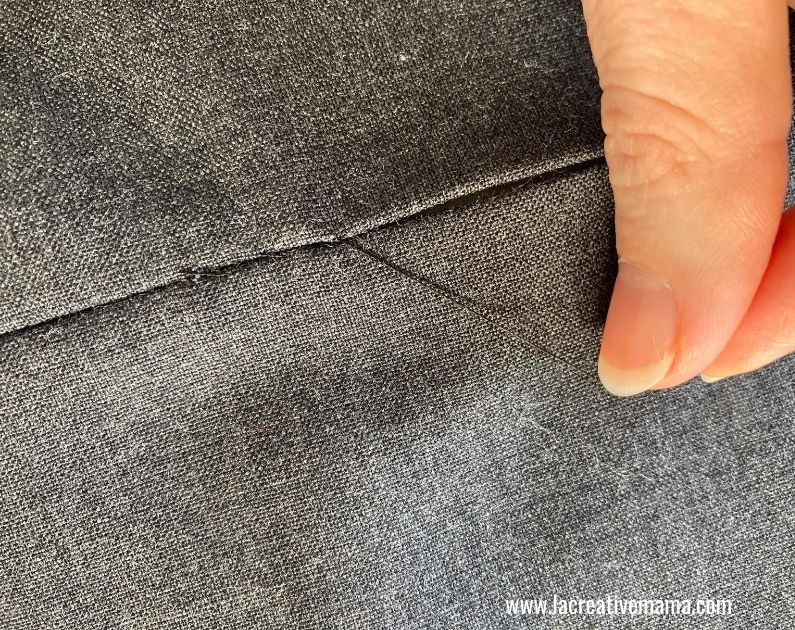
Decide which double panel will be the front and back cover and sew them together with a 1/4 seam allowance. Do the same for the 2 panels which will be in the middle of the book. Press seams open.
In this case my covers are the tie dyed panels ad my middle pages are the pink cotton ones.

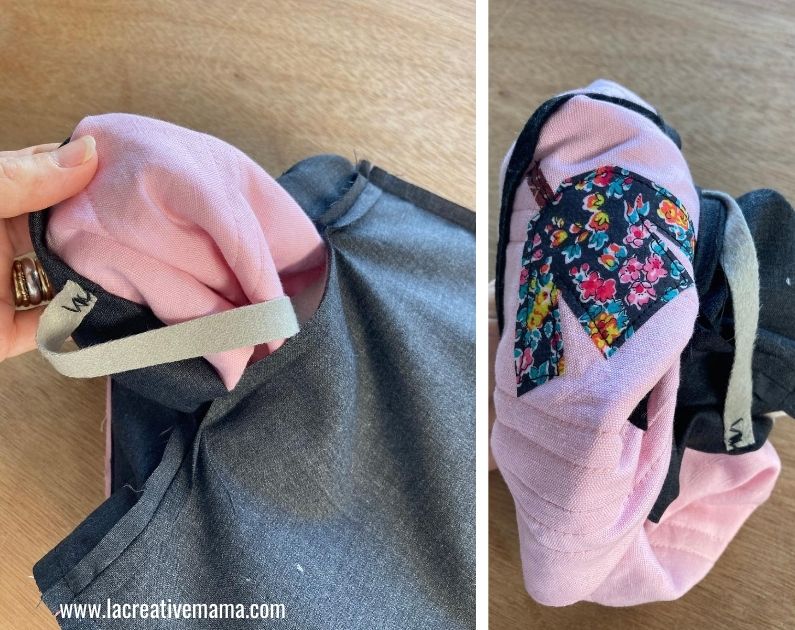
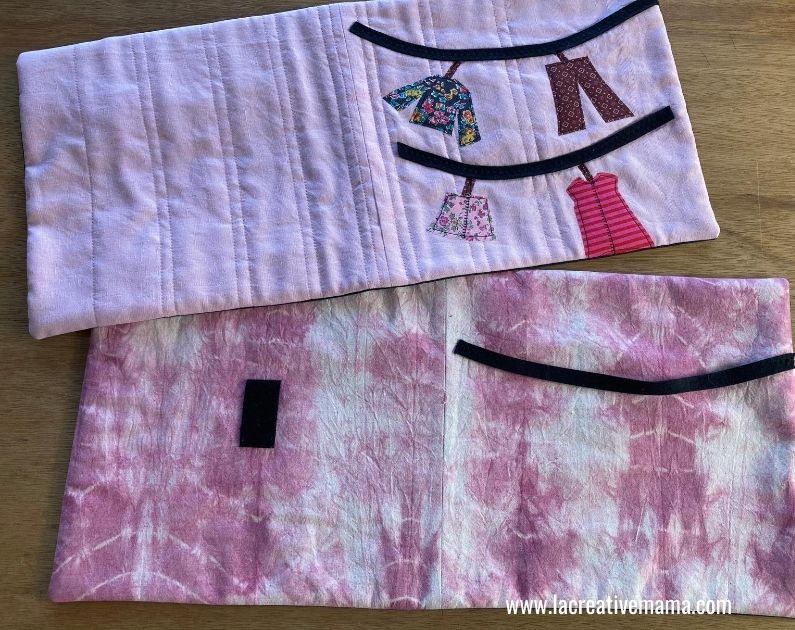
For the other two double pages, sew them together but you need to leave a gap in the middle as shown in illustration below.

Make sure you leave a big enough gap for your hand. This will be the gap that we will use to turn the book pages inside out at the end of the tutorial.

Step 3
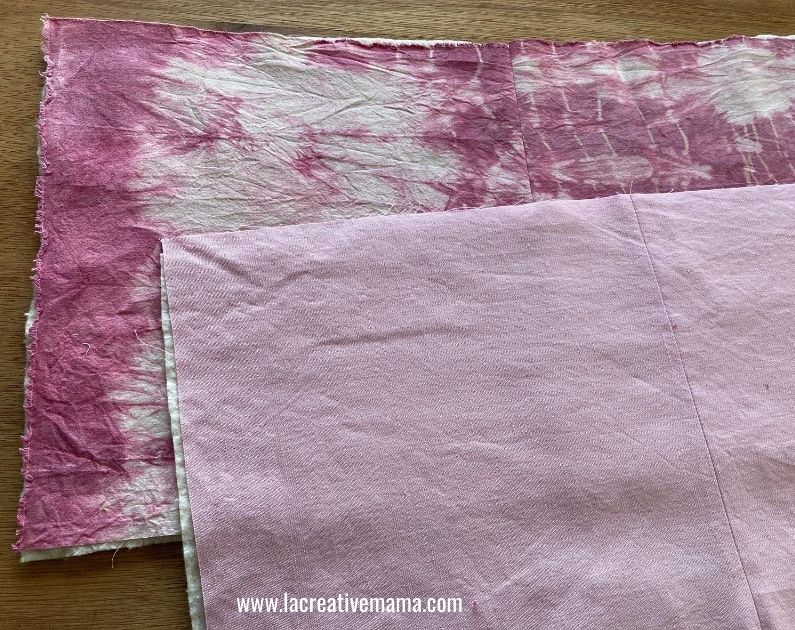
Cut two 100 % cotton batting pieces to fit the covers and the pink double pages.

Step 4
You will quilt these panels using the quilting technique quilt as you go, which is my favorite technique for quilting! See these other quilt as you go tutorial here:
Quilt straight lines parallel to the center seam. Start from the middle and quilt towards the right. when you finish go back to the center seam and start quilting towards the left.

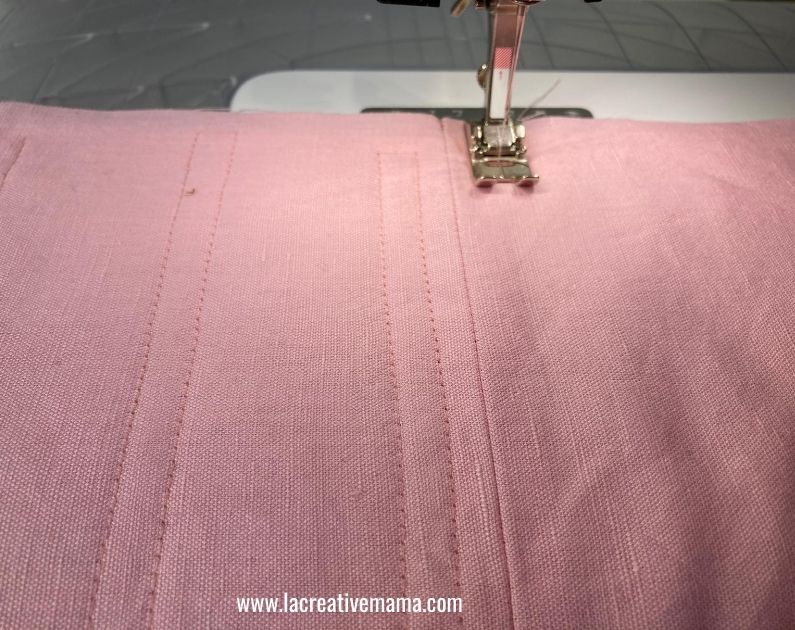
The front and back covers and the middle double pages should look like these once they have been quilted. You can decide to quilt just the cover. this is up to you. I like the texture that its created by the quilting :).

Step 5
Book front and back covers:
This is a long step because we are going to be using applique to make an amazing book cover. Feel free to apply these same principles throughout the book if you wish 🙂
Using the Flat Felt Doll Patterns (available in my FREE RESOURCE LIBRARY— get the password for free by filling out the form above) and the Heat and Bond iron on adhesive, trace around the clothing pattern pieces. You can also use the girl’s body as a guide and create your own items of clothing to fir her body size.

When using the Heat and Bond be sure to trace on the paper side of the sheet. the glue side will be in contact with the wrong side of the fabric.

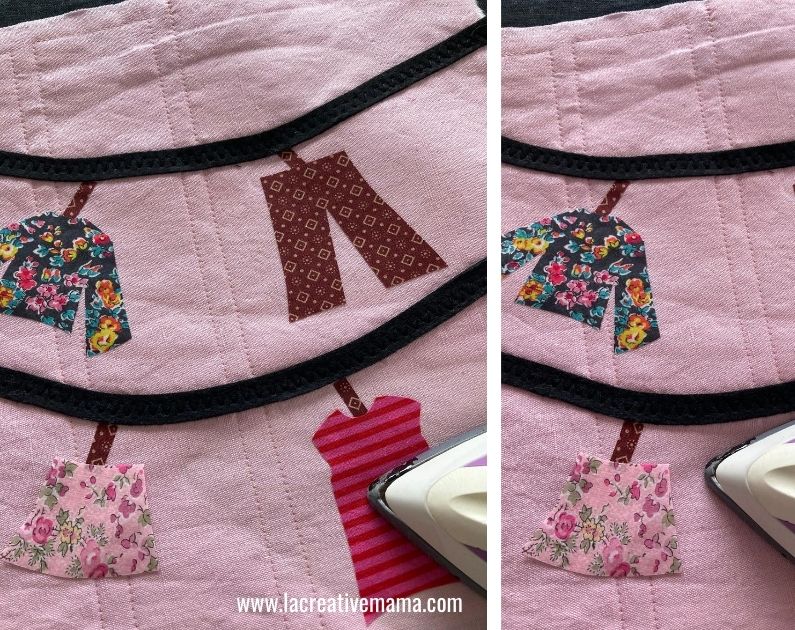
Cut around the traced shapes and place on top of the wrong side of the cotton fabric scraps.

Place a hot non steam iron on top of paper side as shown in illustration.

Once the fusible has been glued on the wrong side of the fabric, cut around the traced shapes.

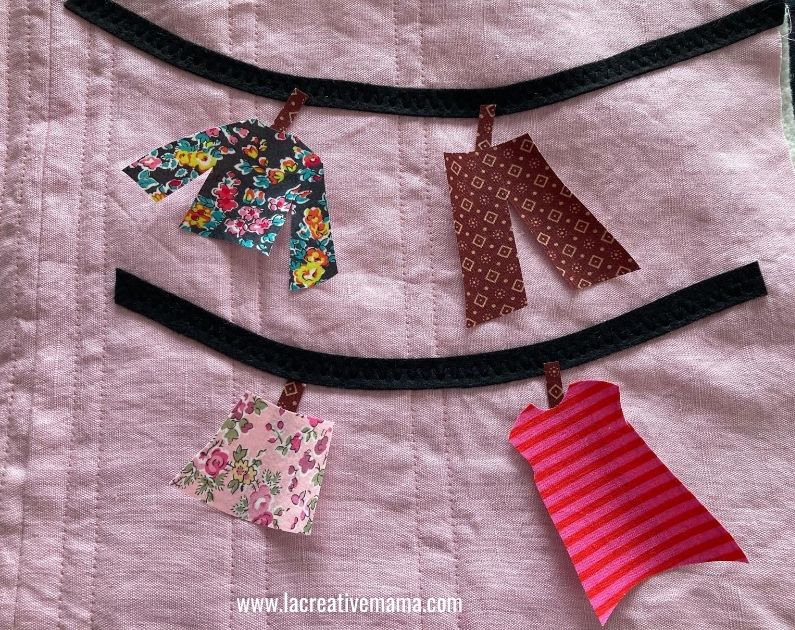
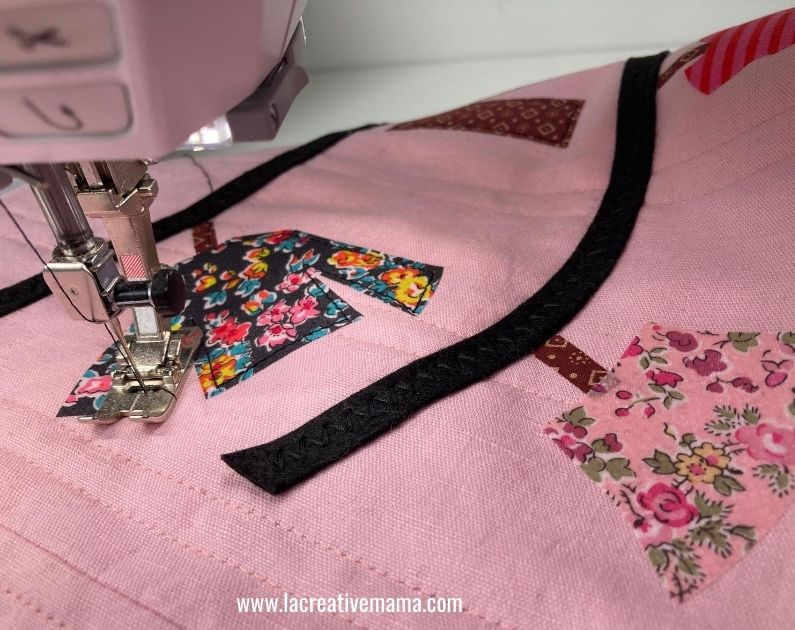
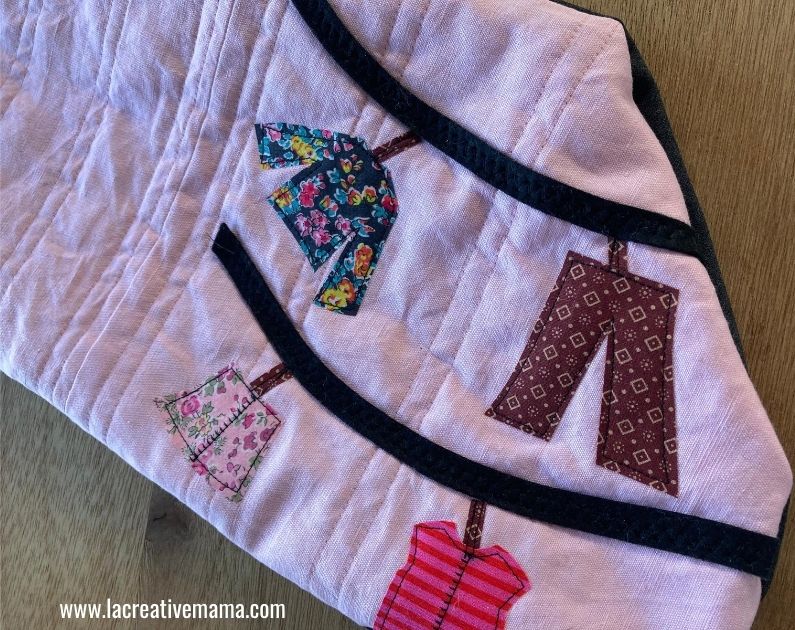
Cut strips of felt in contrasting colors to the book fabric panels. you need to cut 5.

These strips will be the clothes line where we are going to hang the little applique clothes. Pin them in place making sure to cover the whole front cover.

Place the clothe under the line to make sure that you are happy with the placement before anything is sewn or fused.

Sew the felt strips in place using a wise zig zag stitch in matching thread.

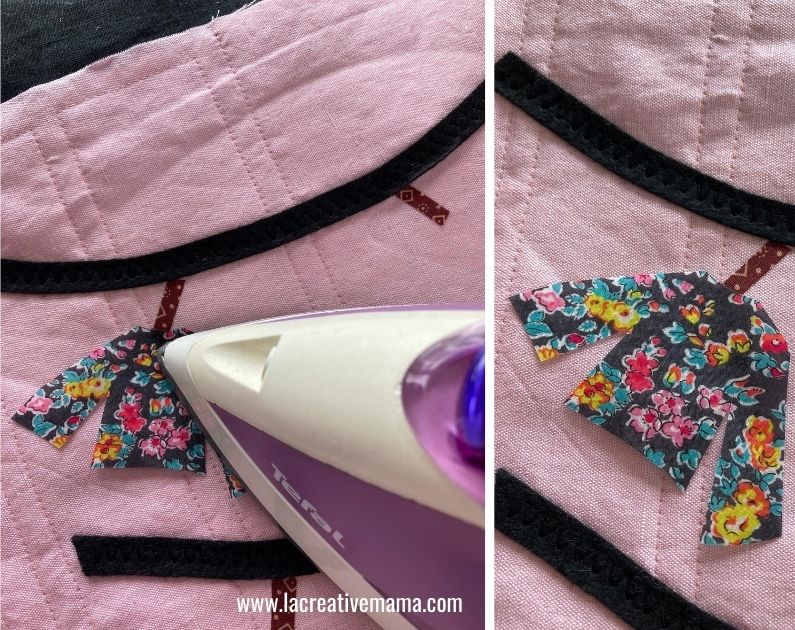
Cut a little rectangle from the leftover of the fused fabric scraps and place it under the clothesline. This will be the clothes peg. Remove the paper side of the iron on adhesive from the wrong side of the fabric and with a hot iron press in place. Repeat this process with all 4 pegs.


Now do the same with the clothes. Peel away the iron on adhesive from the back of the clothes and press under the little peg.

It’s time to stitch around the applique pieces. You need to top stitch all around them. I have used my default stitch length and my regular sewing cotton but you can use heavier top stitch cotton if you prefer. Repeat this process for all clothing pieces which have been appliqued.

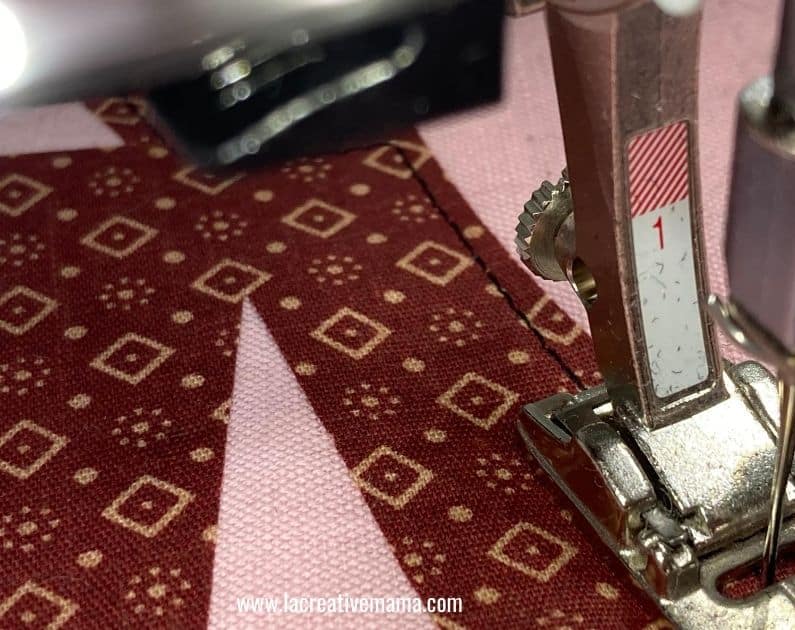
I have also used one of my sewing machine embroidery stitches. I have a Bernina and this is the blanket stitch which is part of the default fancy stitches.

At this point the cover is completed so let’s get on with the rest of the book 🙂
Step 5
Pin the felt strips which were previously cut to the right page of the double pages.
These strips will be the clothes line where we are going to hang the different items of clothing which have velcro on the back. Please note that this book pages are not made out of felt which means that the clothes with velcro will not stick to the fabric page. the clothes will only stick to the felt doll.
We will hang the clothes from the clothes lines using mini wooden pegs

Sew in place using a wide zig zag stitch. Only sew the ends of the strip to allow the clothes line to hold the clothing pegs later on.

We now have the four double pages and they should look like the illustration below 🙂

Step 6
It’s now time to incorporate the flat felt doll that you have created following this tutorial. For this book you will need to make 3 dolls.
Cut a piece of velcro and glue it to the left page of the double page. Use fabric glue for this step.

Make sure the flat felt doll has velcro as well and that the sizes match.
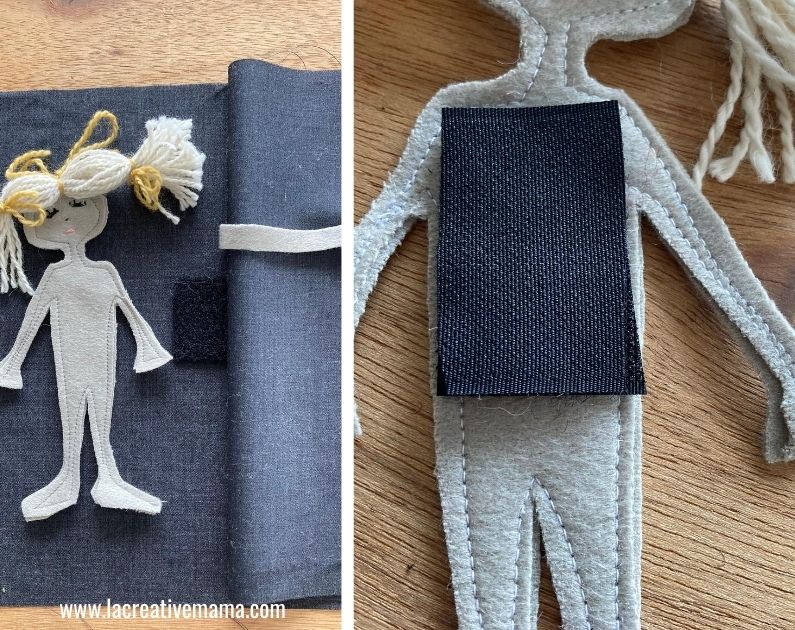
The three double pages should look like this.

How to make a quiet book tutorial Recap:
By this stage you should have:
- 3 flat felt dolls
- 1 double page which is the front and back covers with applique
- 3 double pages with the clothes lines and velcro applied.
How to sew the quiet book?
Step 7
It’s now time to sew the quiet book together. In order to do this we need to understand how the pages are actually relating to each other. In the graphic below I have drawn a little sketch for you to refer to in case you get confused. For this quiet book Follow the following guidelines:
- Sew the front and the back covers to a double with a gap in the middle
- Sew the tie dyed double page to a double page with a gap in the middle.
Note that the front and back covers as well as the tie dyed double page have the batting, are quilted and have no gap in the middle.

Using the cutting mat and the rotary cutter make sure that the edges are matching and trim away any excess fabric. Also make sure that all 4 double pages end up the same size.

This is how the 4 double pages look on one side:

This is how the 4 double pages look on the other side. Note the gaps in the middle.

Stitch around the 4 edges leaving 1/4 inch seam allowance. Trim the corners.
Using the gap in the middle turn the book inside out.

Using a crochet needle or a pencil make sure that you get 4 nice corners before you press the double pages. Press with a hot steamy iron.

Step 8
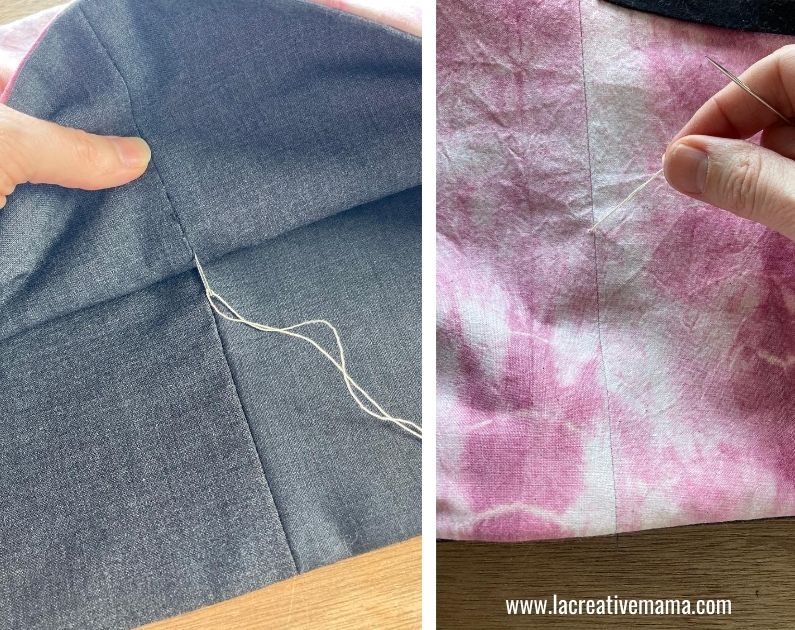
Once the double pages are nicely pressed you need to close the gaps. Using a hand sewing needle close the gap by inserting the needle from the inside of the page and doing a blind stitch until the gap is completely closed.

So at this stage this is how your double pages will look:

And these are the pages plus the dolls all ready to be placed in the book :). Lets do that now!

Step 9
Place the book on your sewing table. Make sure that the book cover is facing down. Place the other double page with the pink tie dyed fabric facing up. In other words, the double pages that had the gap need to be touching each other and they are the inside pages of the quiet book.
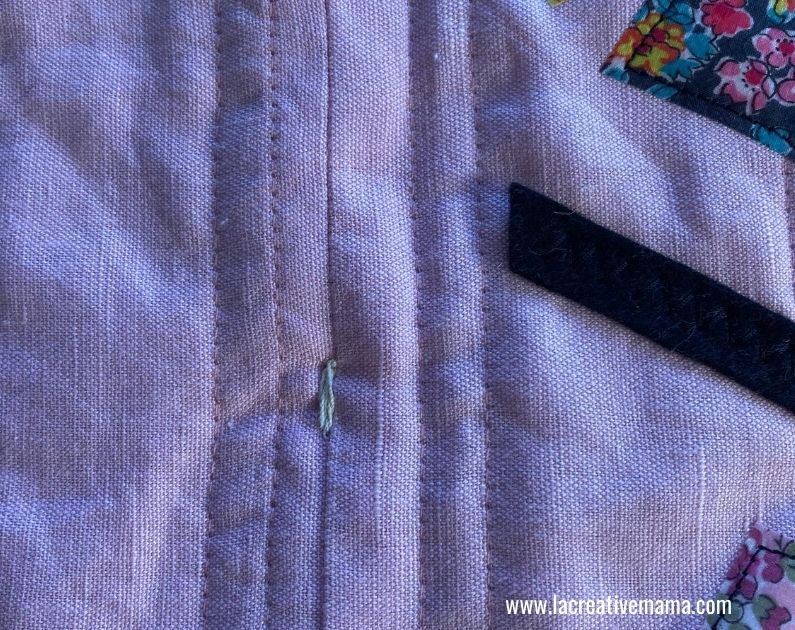
With an embroidery thread of your choice (it can be a top stitching thread as well) we need to sew all the layers of the quiet book together. Thread a hand sewing needle with a double thread.

Insert the needle through the middle of the book and come out to the middle pages.

Insert the needle back again but this time put the needle through all layers of the book and come out through the book covers. Repeat this process three times. This will be the first book binding stitch. you need to make at least two of these so that the book holds together nicely.

The final result of the quiet book tutorial using the free doll patterns 🙂

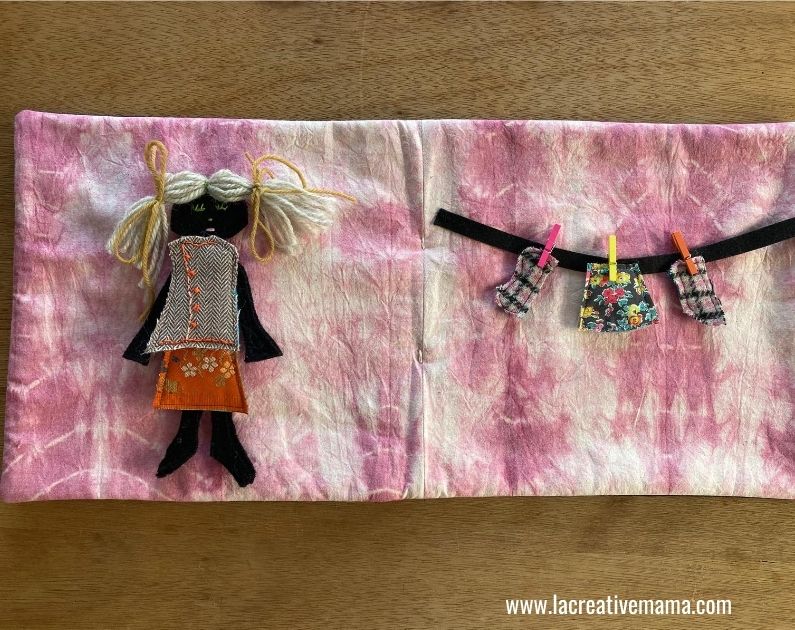


You can get super creative by embellishing your quiet book and your dolls using different creative sewing crafts techniques. The sky is the limit!!!!
Download your FREE FLAT FELT DOLL PATTERNS now
Want to remember this? Save this Tutorial to your favorite Pinterest board!
